


Introduction
Since the revolution of Jamstack in the recent years, many companies are now looking for full stack developers who can write JavaScript to request data from the headless API and render markups for the end users. For this reason, Jamstack stands for JavaScript, API and Markup (generated by a static site generator).
Although I am a good API integration developer, I decide that the JavaScript frameworks such as React, Vue and Next.js are not for me 😭. To keep up with everyone else, I decide to try out Blazor WASM that is an alternative that lets us build static app in .NET.
Today, I'll show you how you can easily build a Blazor for .NET 6 app and render content from a headless CMS such as Contentful and deploy it to Azure Static Web App but you don't have to pay for anything. Even so, you will get a very fast website because all the magic will happen on the client side.
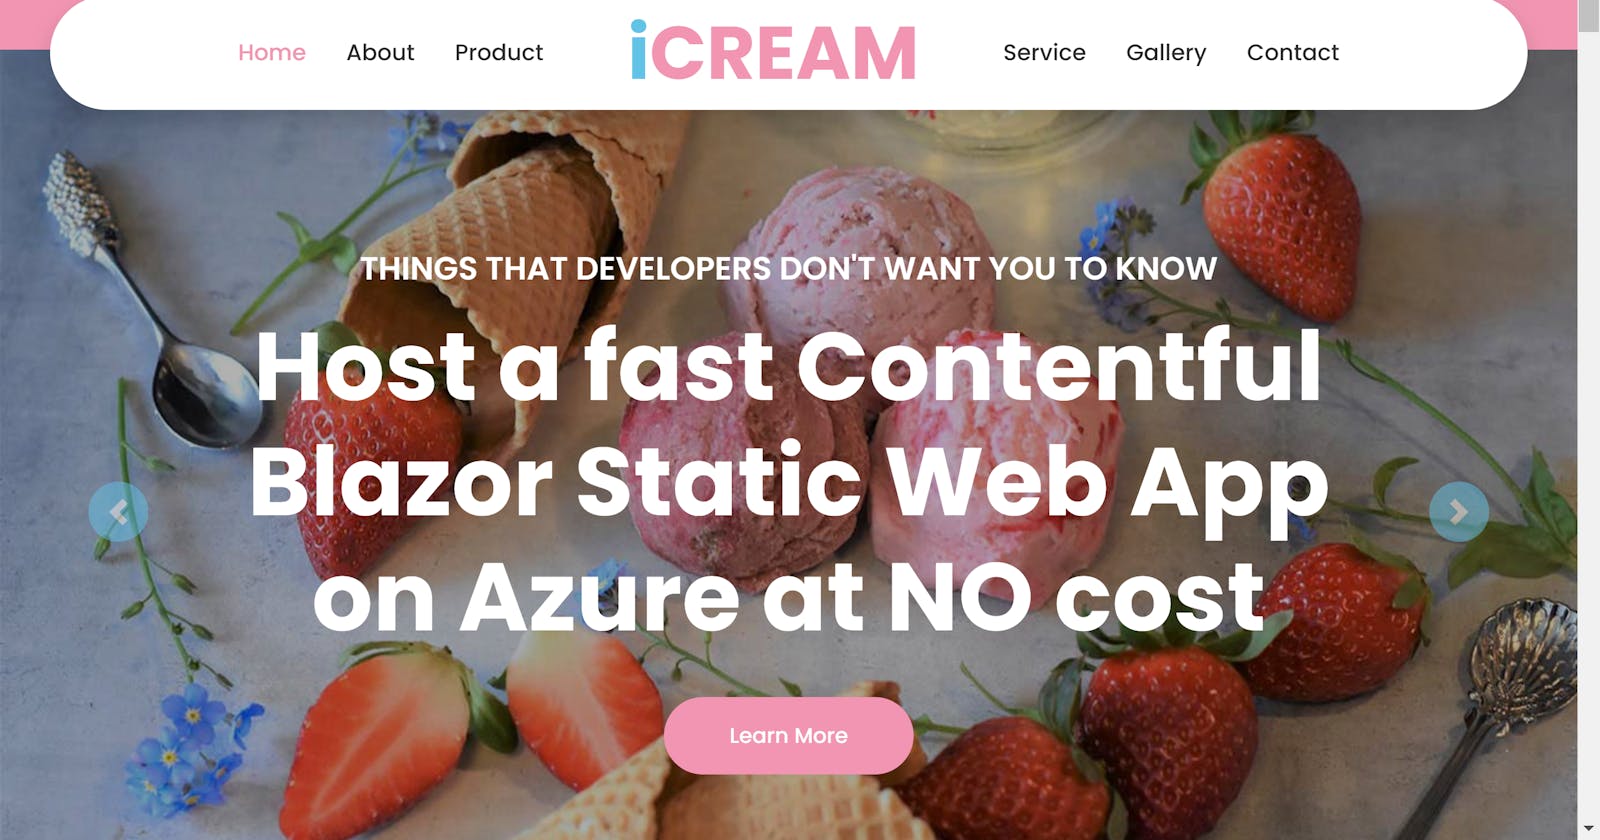
💻 Demo site: gray-meadow-0470fee00.1.azurestaticapps.net
💻 Github: github.com/thaitranet/iCREAM
Add entries in Contentful
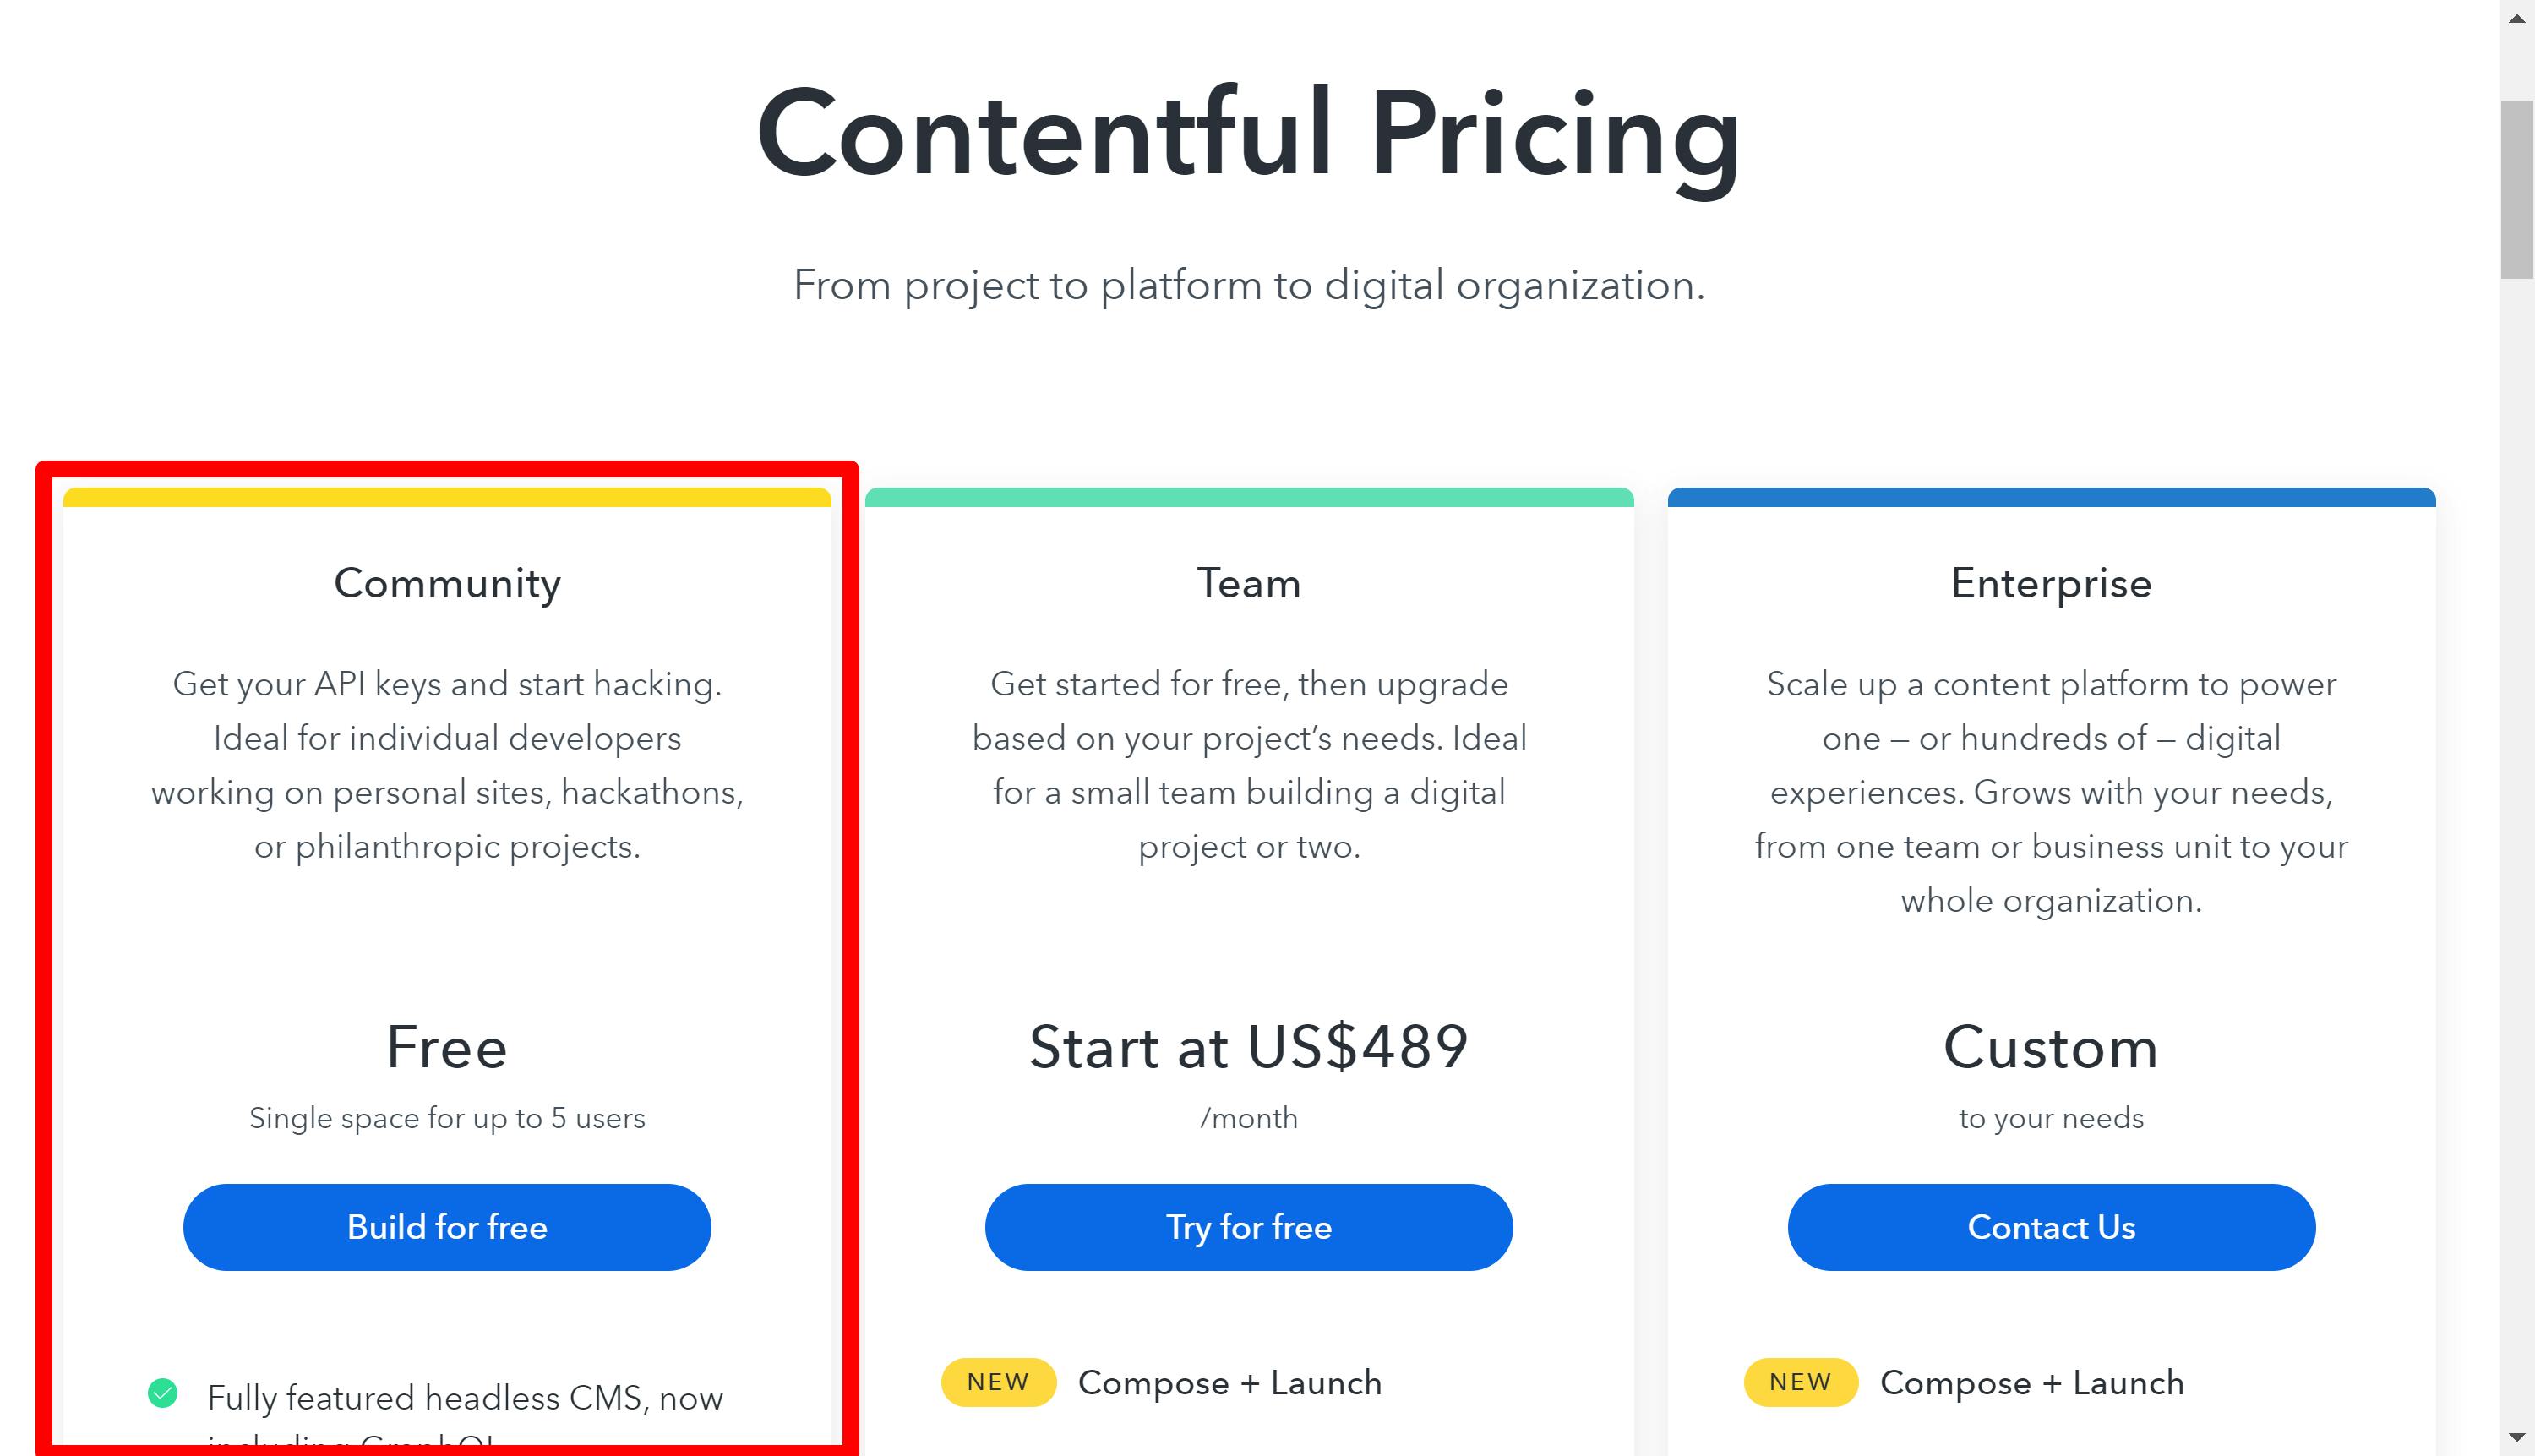
First of all, you will need to set up a new project on Contentful for free if you want to try out the Community plan.
This plan is ideal for starters working on personal sites or some initiative projects. You will get a single space for up to 5 users and a fully featured headless CMS including different SDKs and GraphQL. I prefer Contentful to other headless CMS for its intuitive UI and rich feature set.
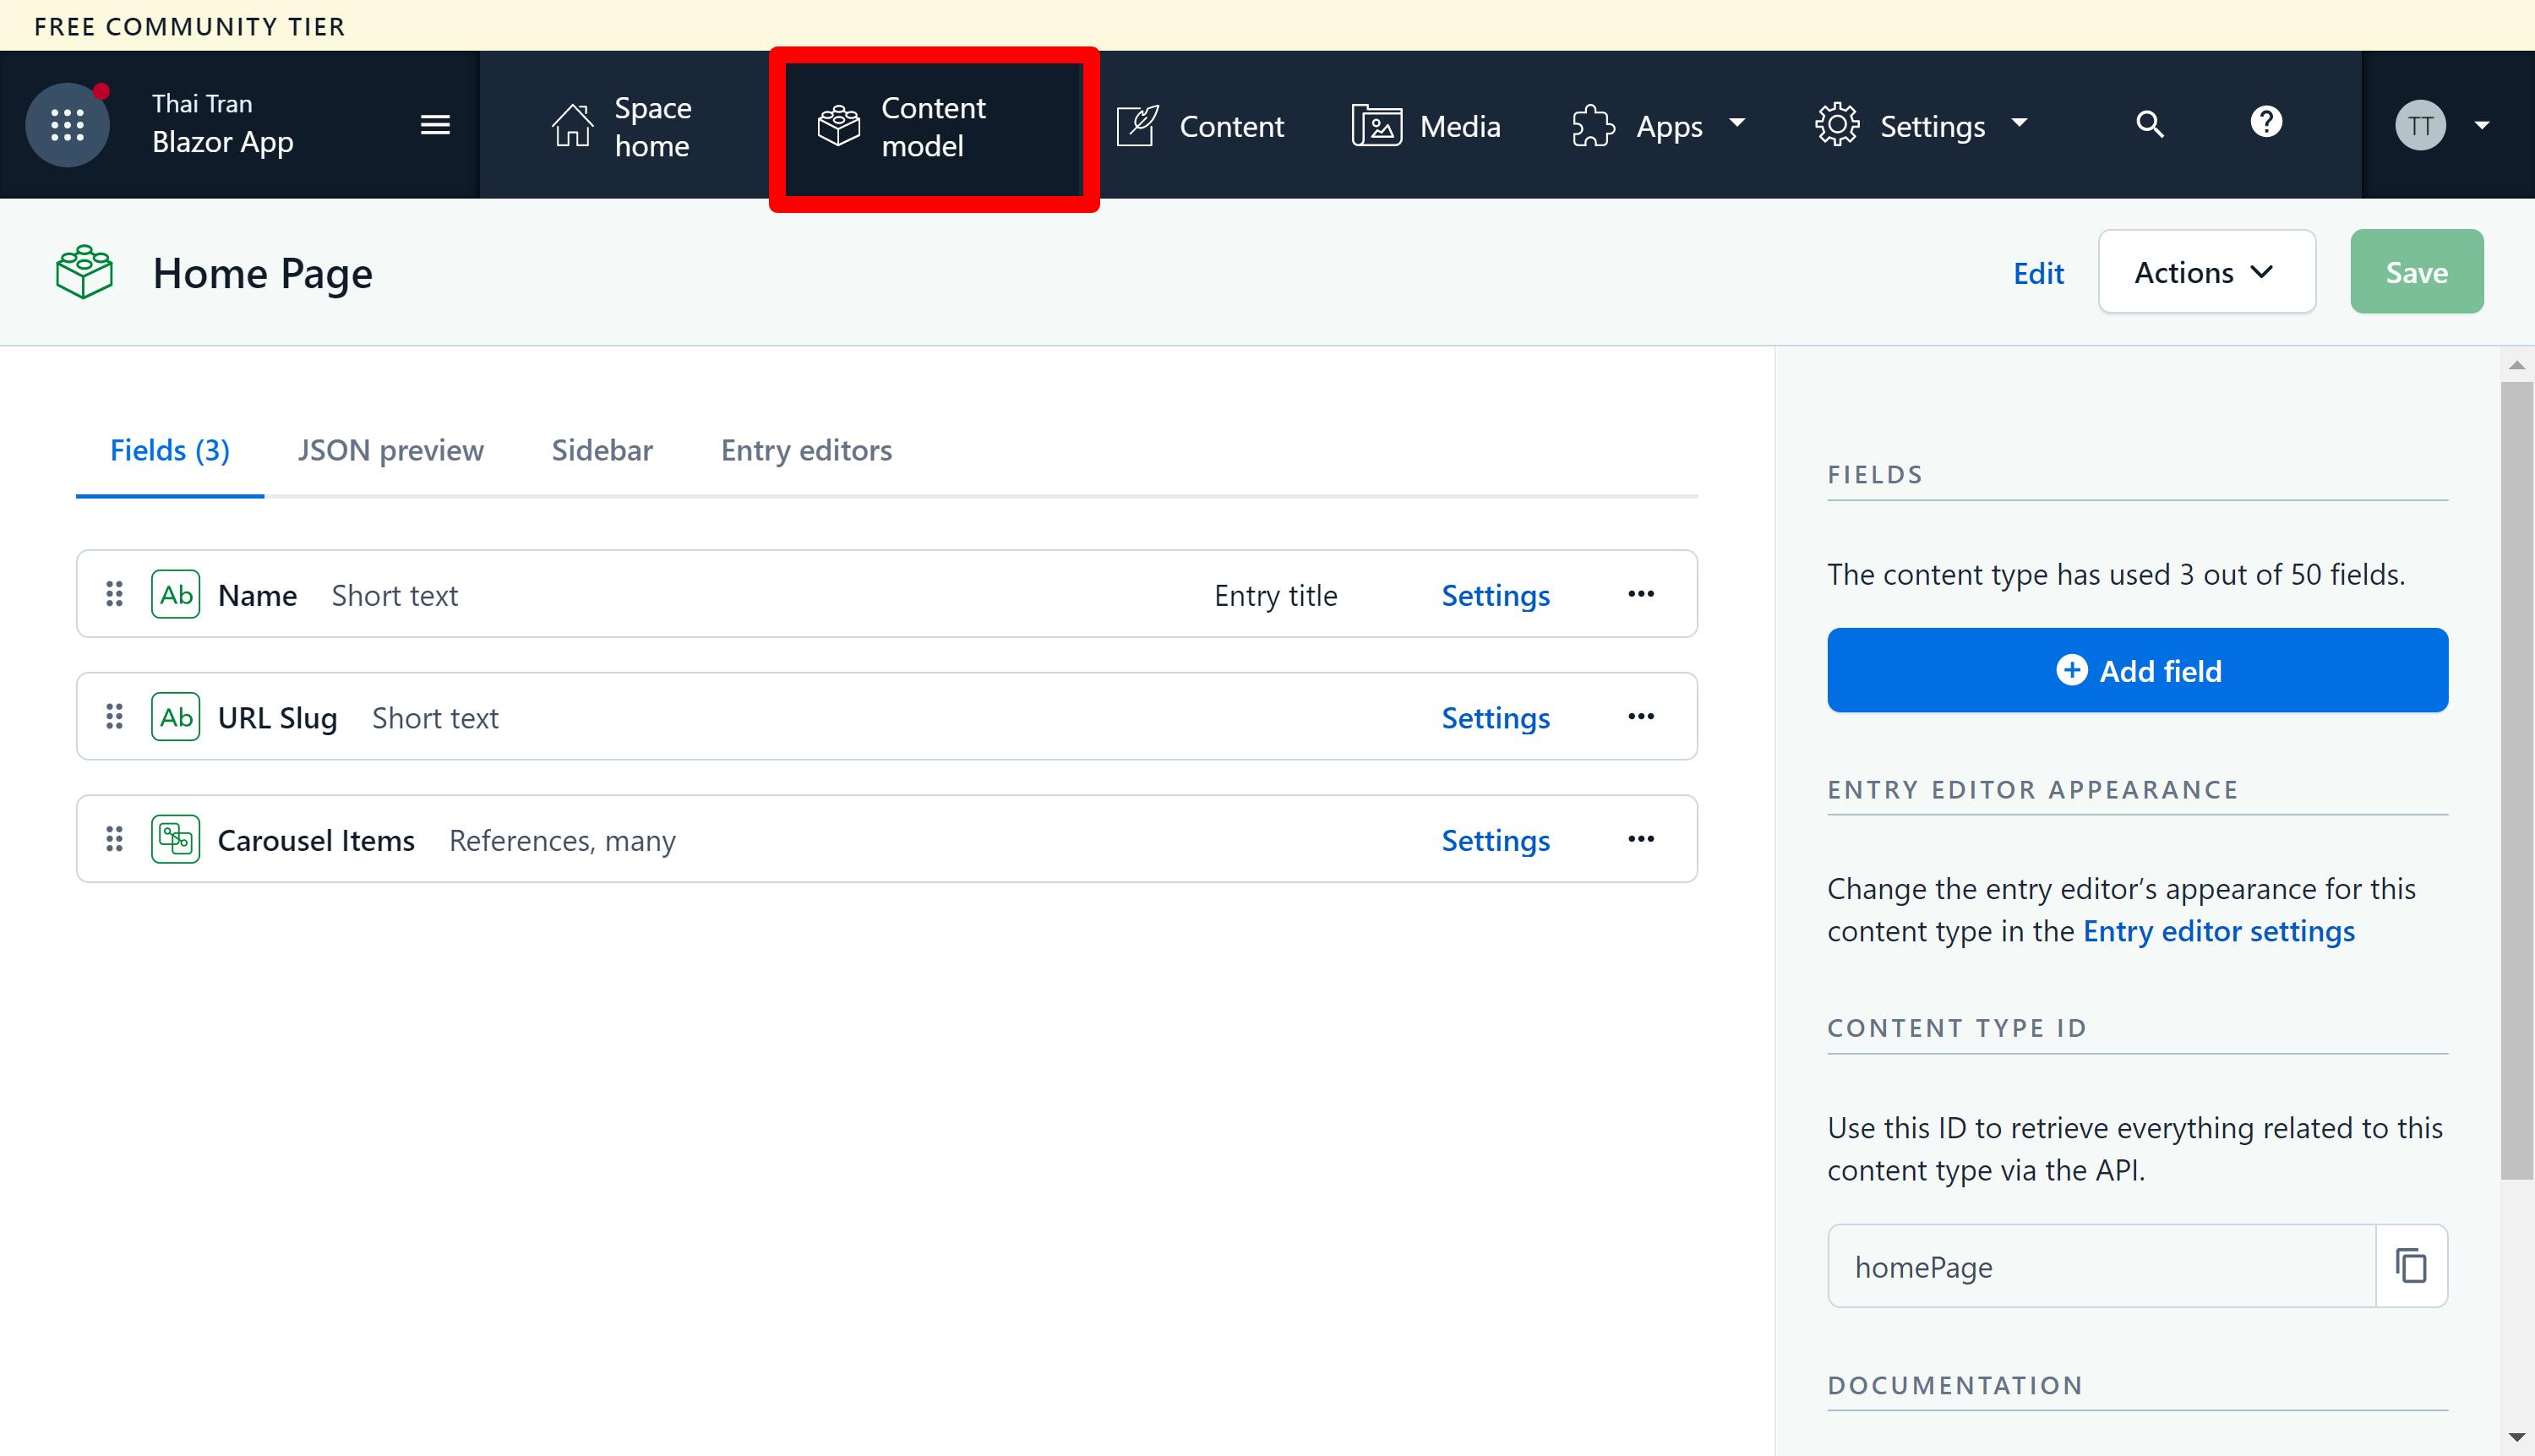
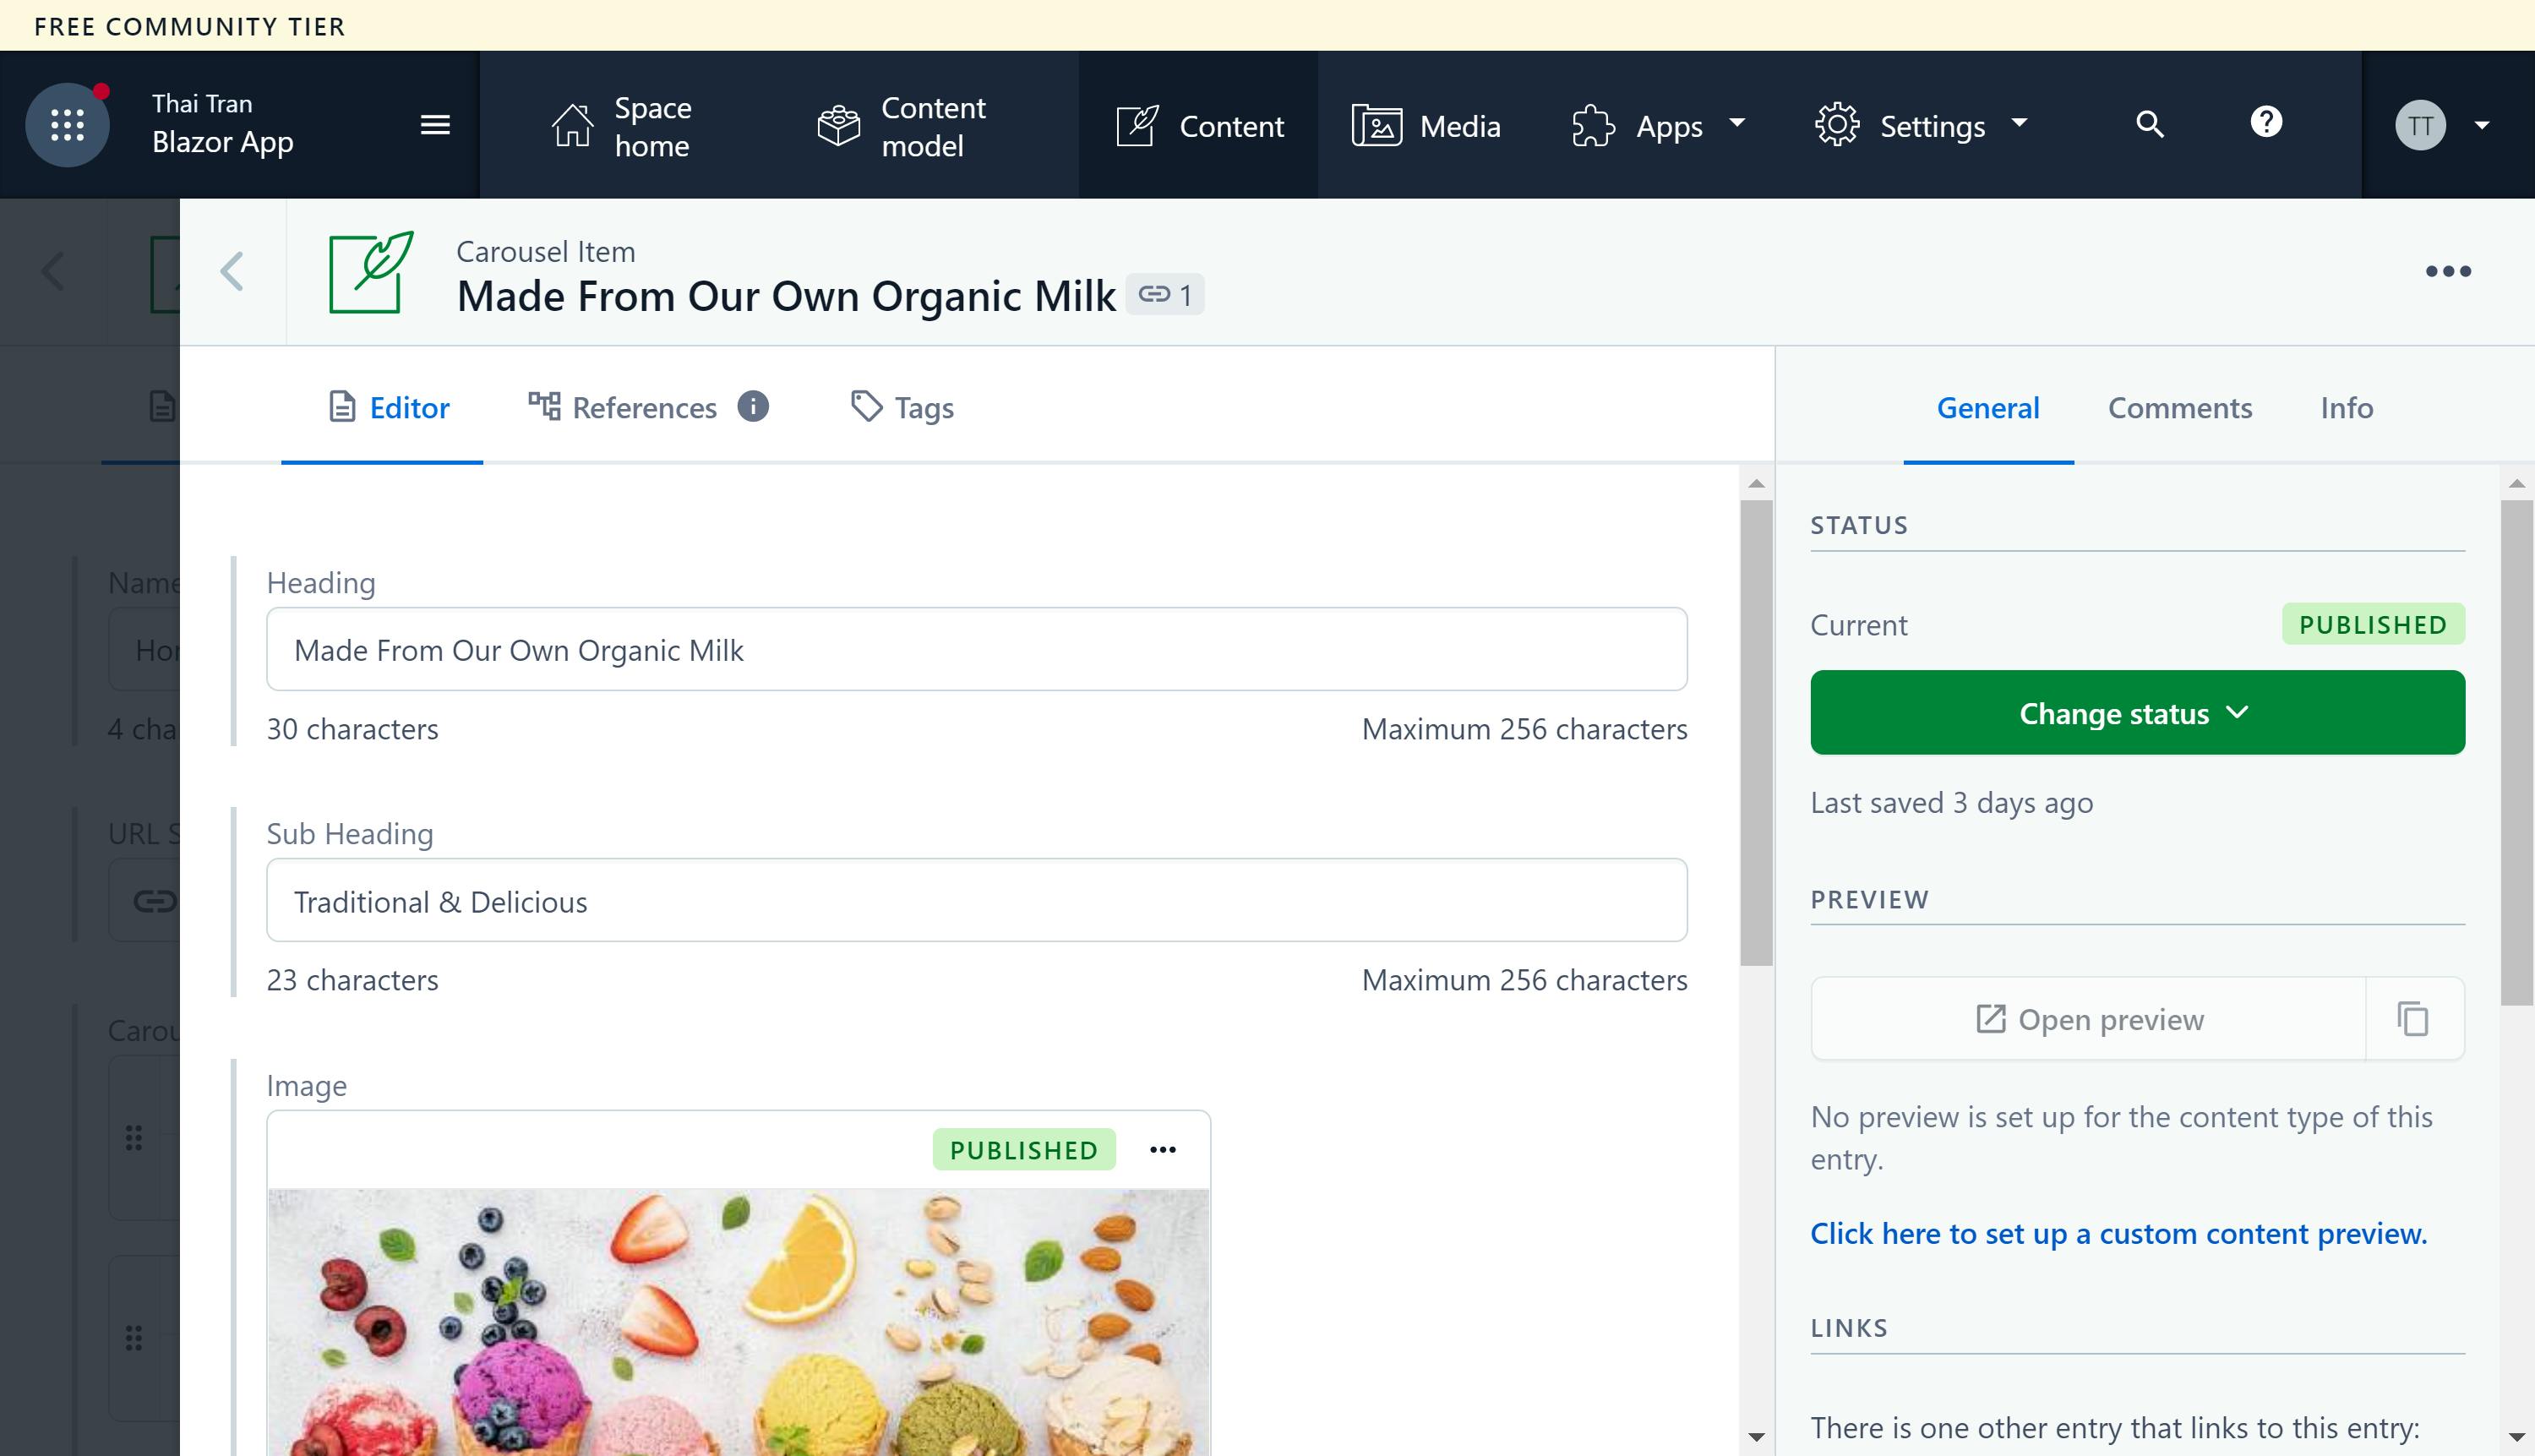
Once you have set up your first project, you can start adding your content models. In the following screenshot, I will add a content model for my home page with some editable fields:
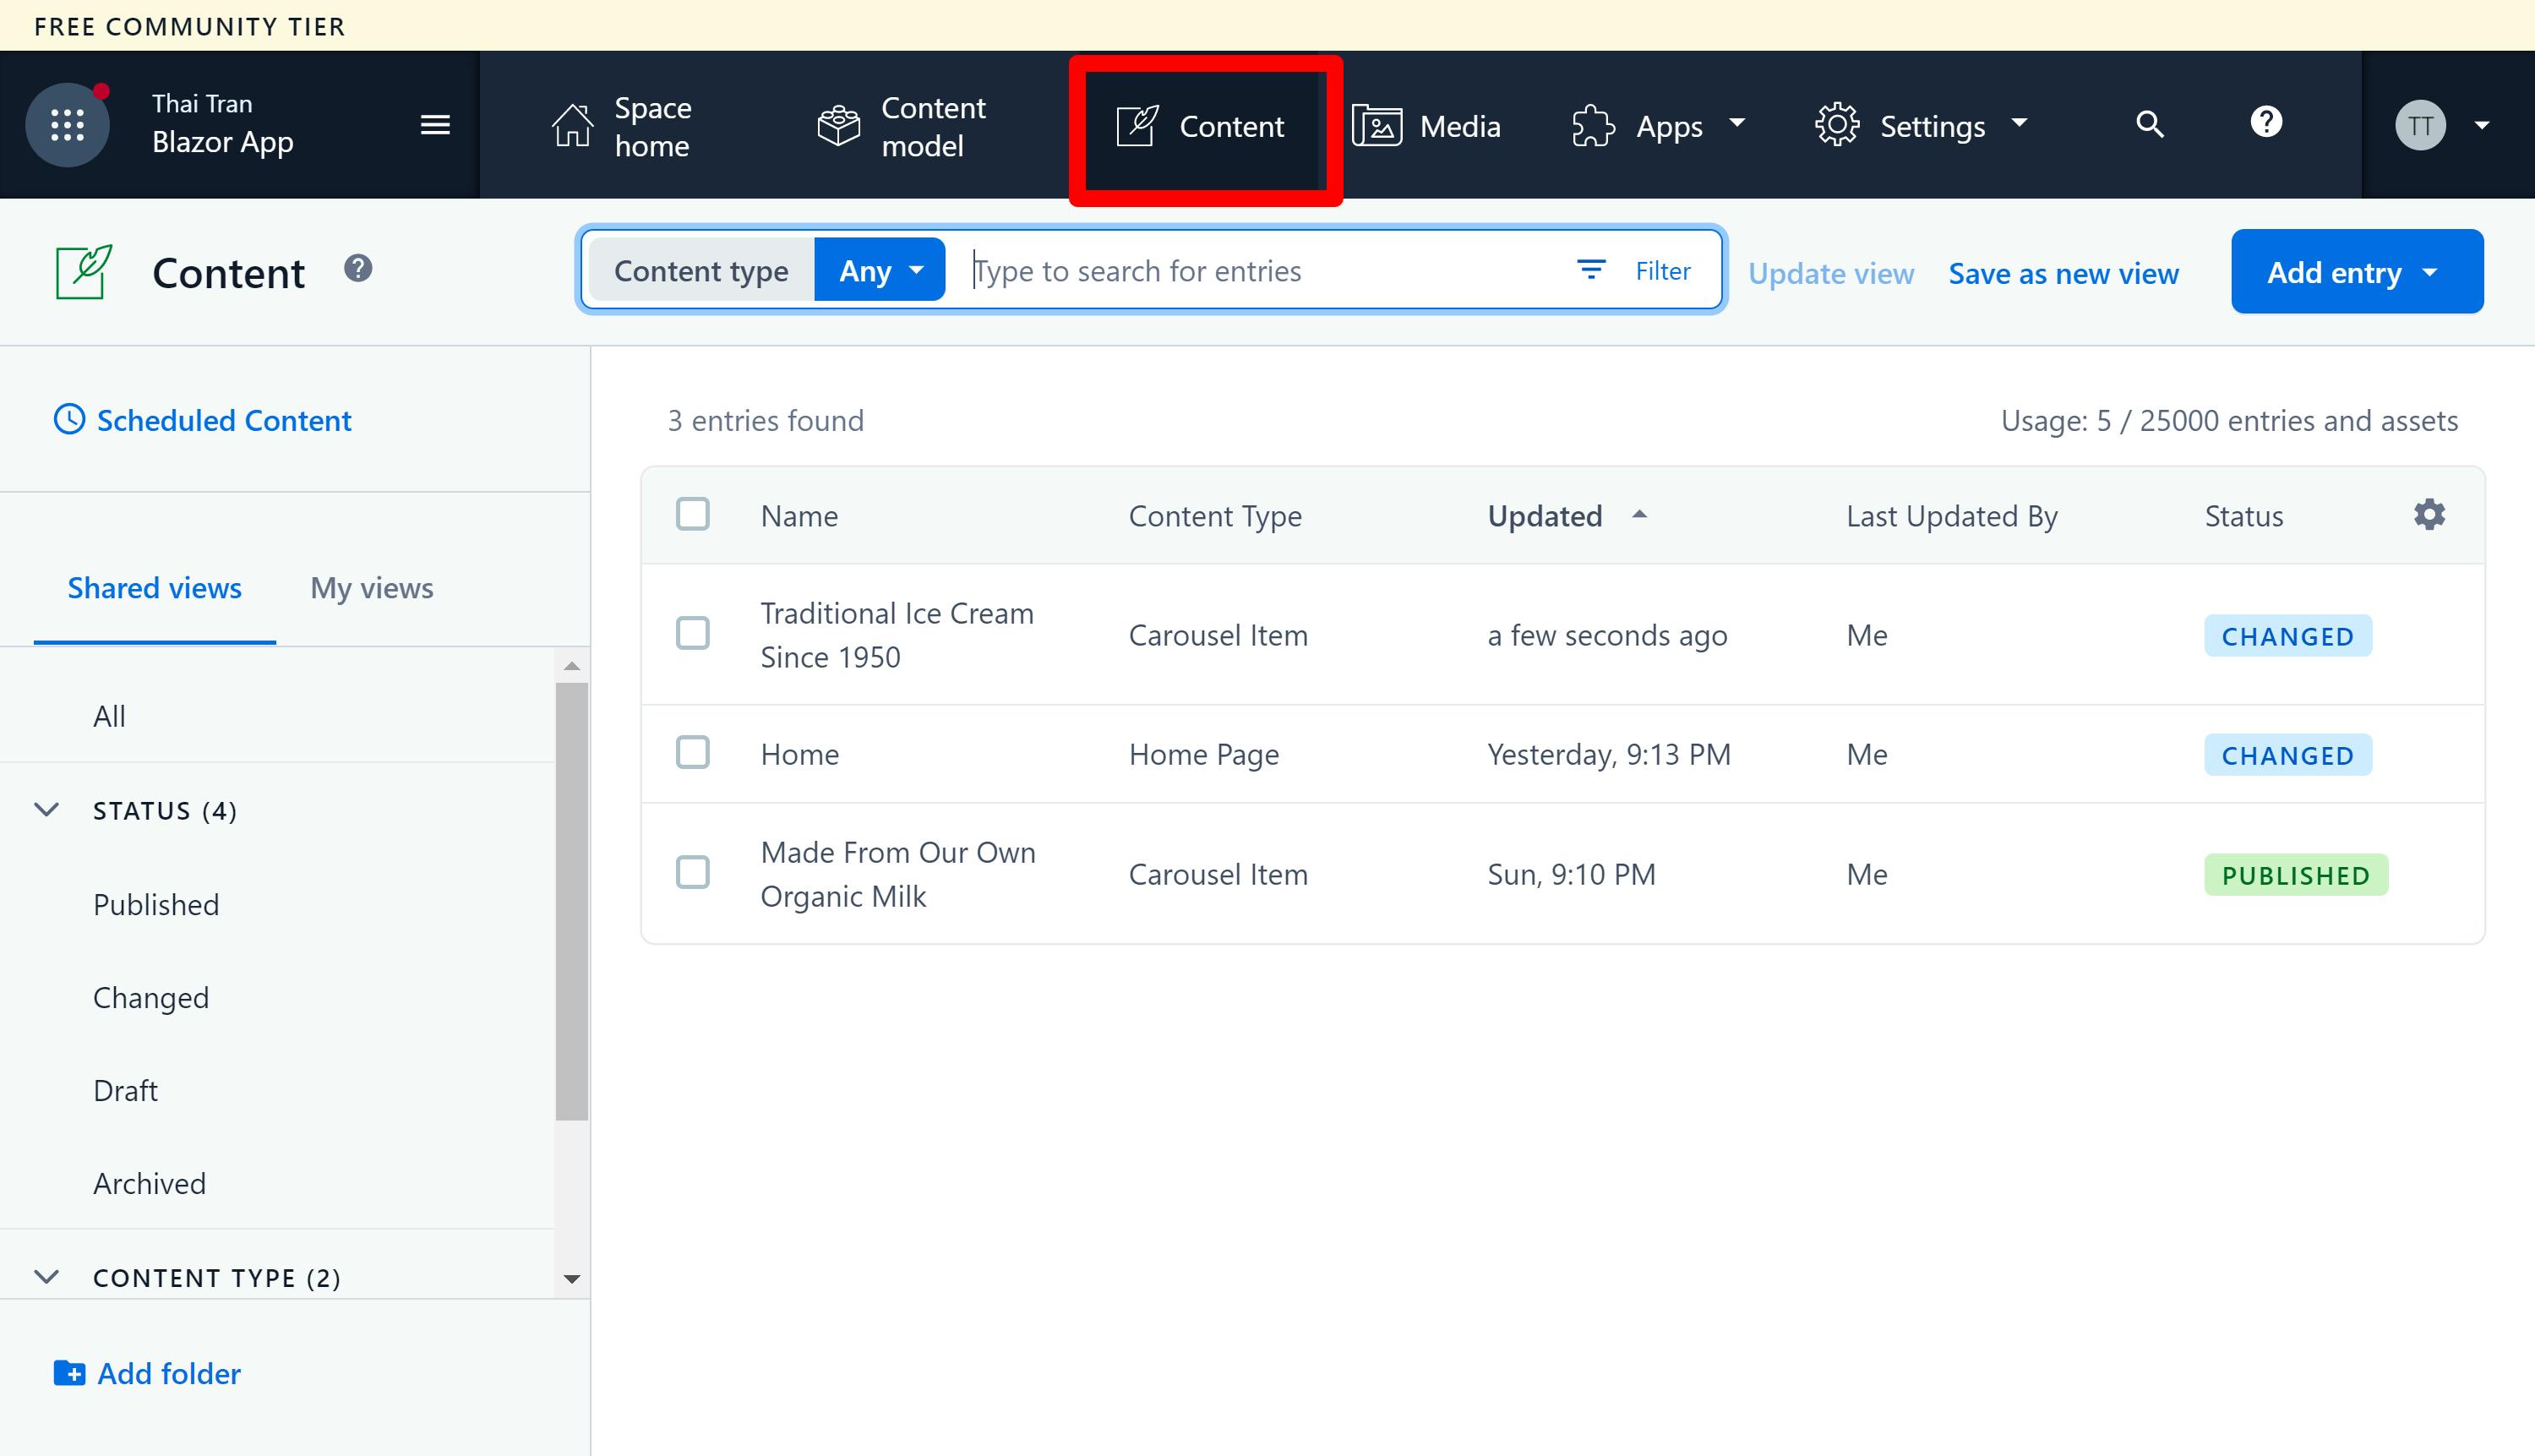
Next, I will add some entries for my content models:
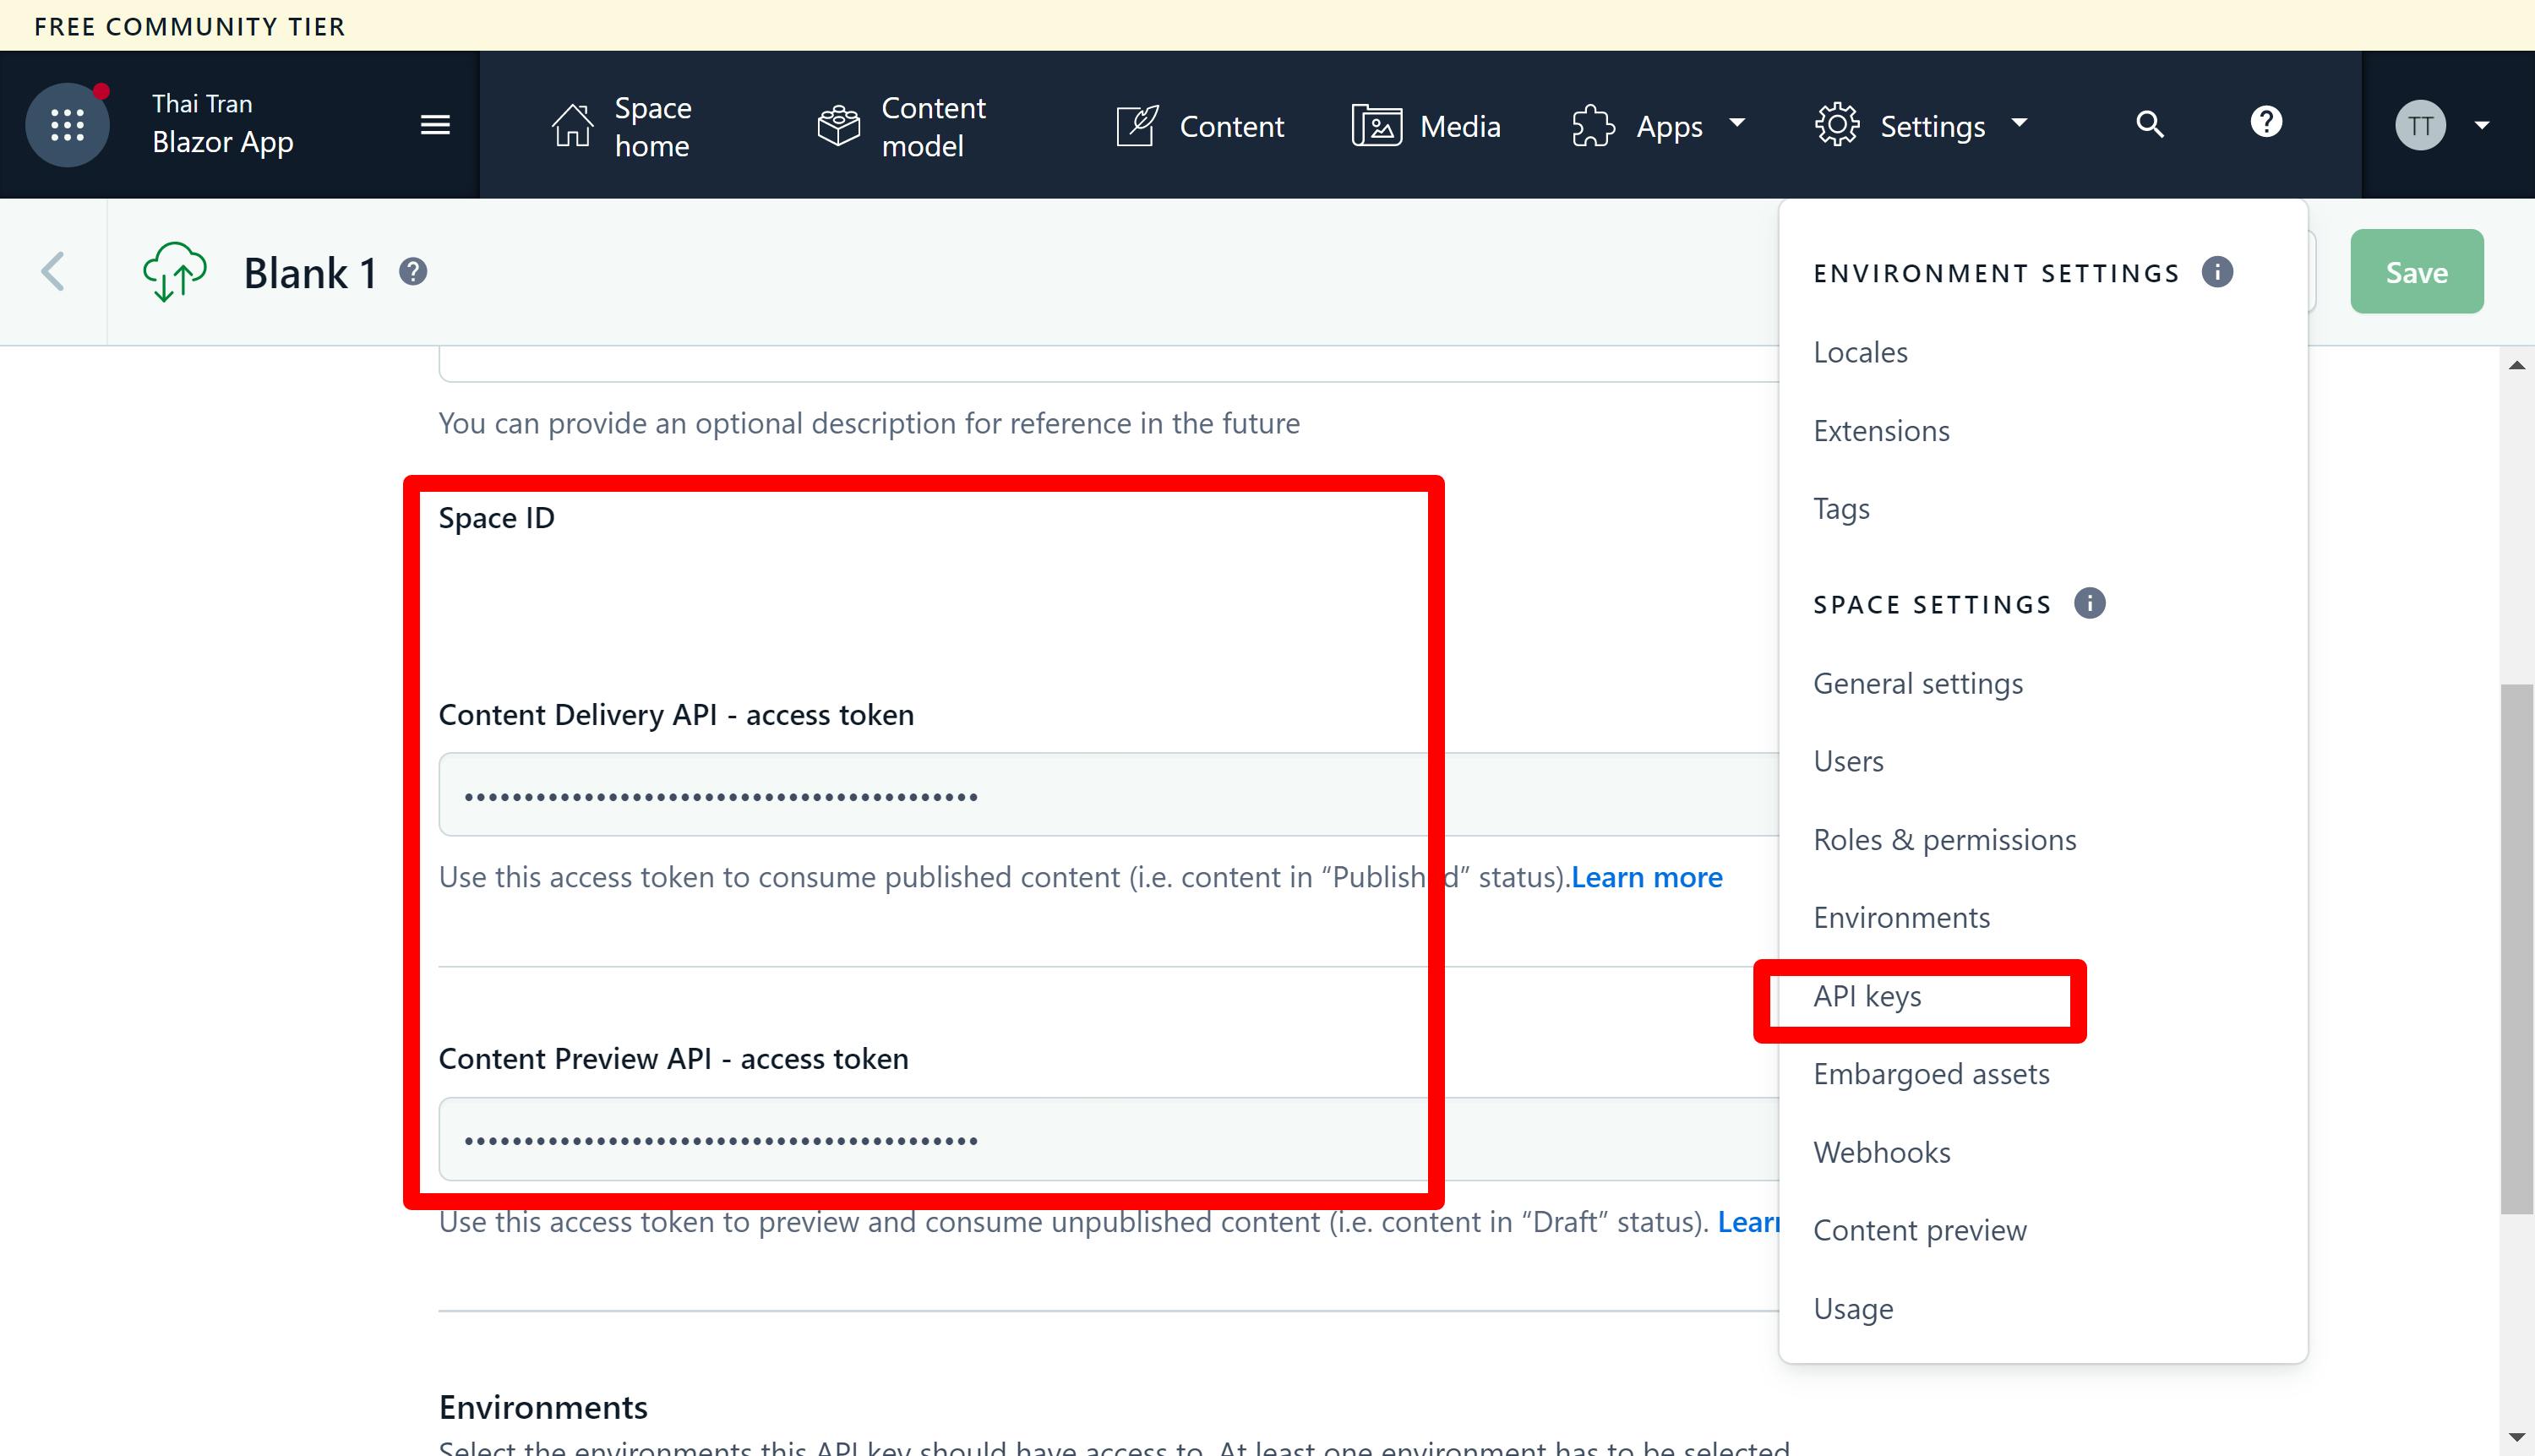
Go to Settings > Space Settings > API keys to get the Space ID, Content Delivery API - access token and Content Preview API - access token that will be used to get entries from the Blazor app later.
Now, we are ready to write our code.
Create a new Blazor app project
Let's create a new project in Visual Studio from the Blazor WebAssembly App template. Blazor offers several hosting models including server side, client side with or without ASP.NET Core hosted. Converting from a client side project to a server side project is pretty simple and I will write another blog post about it. You should choose .NET 6 as many new features have been added to Blazor for .NET 6.

You may want to design the structure of your solution so that related things should be kept together (high cohesion).
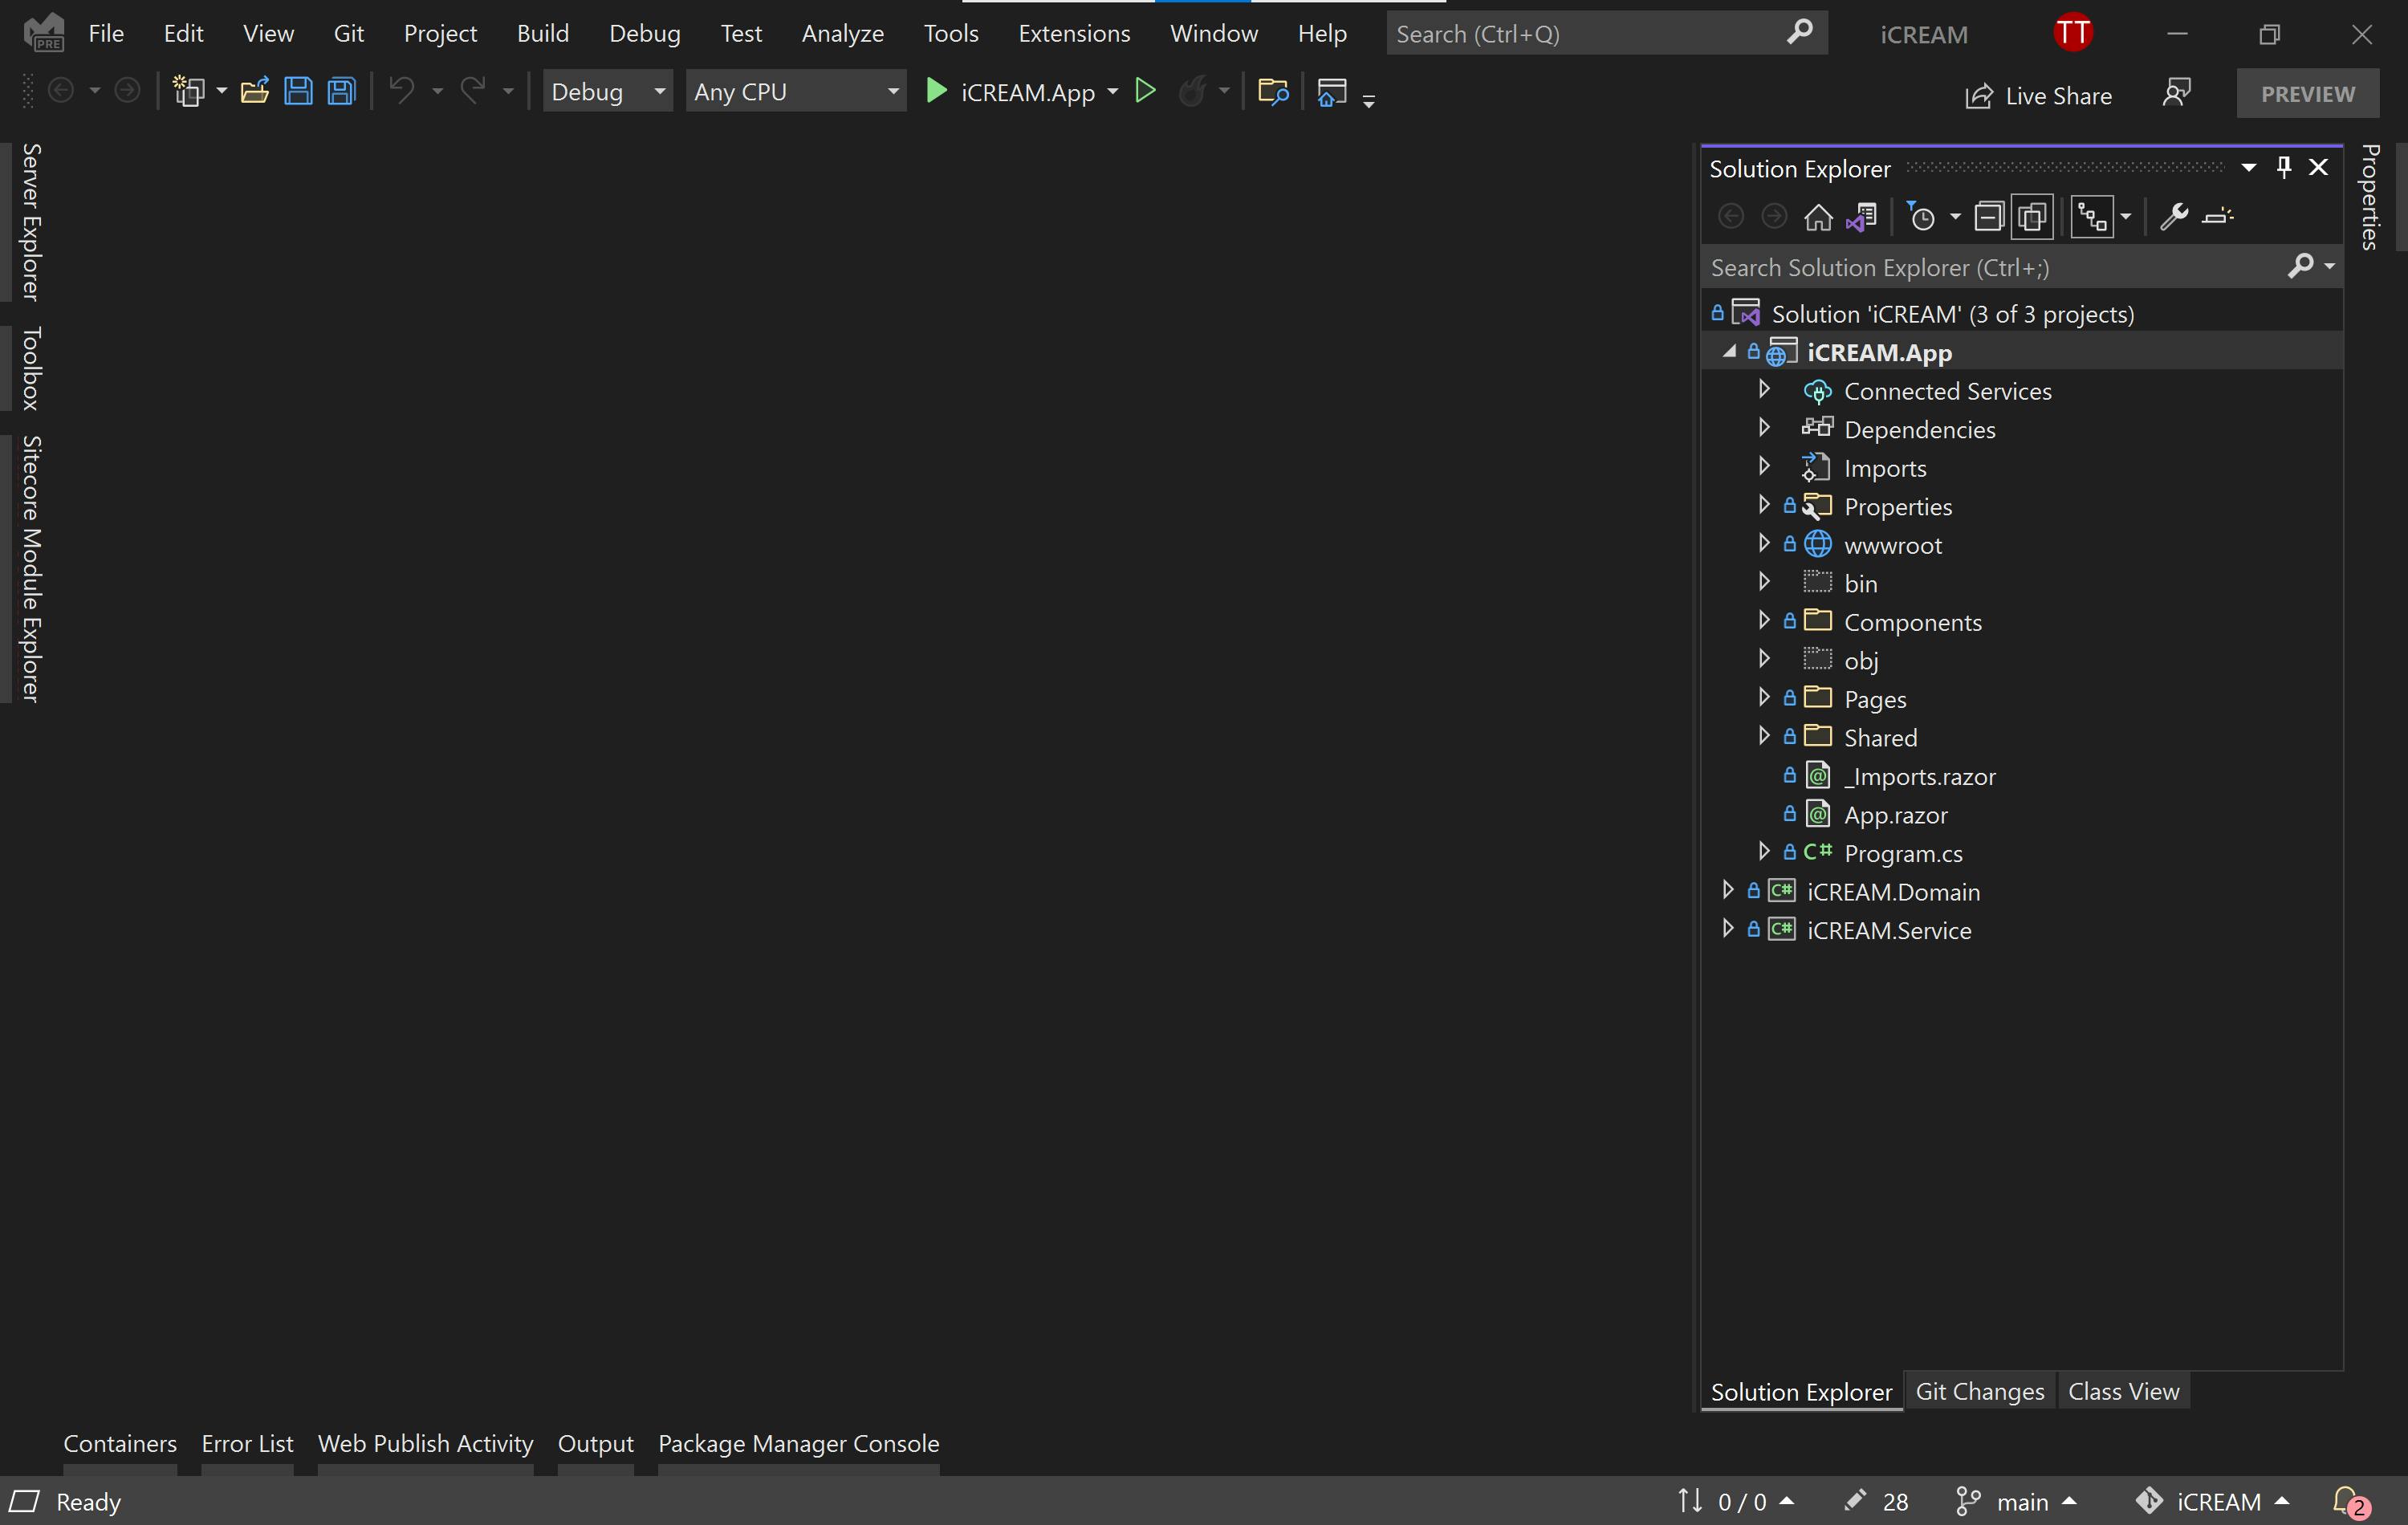
I keep the following projects in my solution:
- The iCREAM.App is a Blazor WASM app that contains the presentation files, Blazor pages and components
- The iCREAM.Service is a NET Standard project that contains the data repositories to get data from the Contentful API
- The iCREAM.Domain is a NET Standard project that contains the content models that we will generate from Contentful in the next section
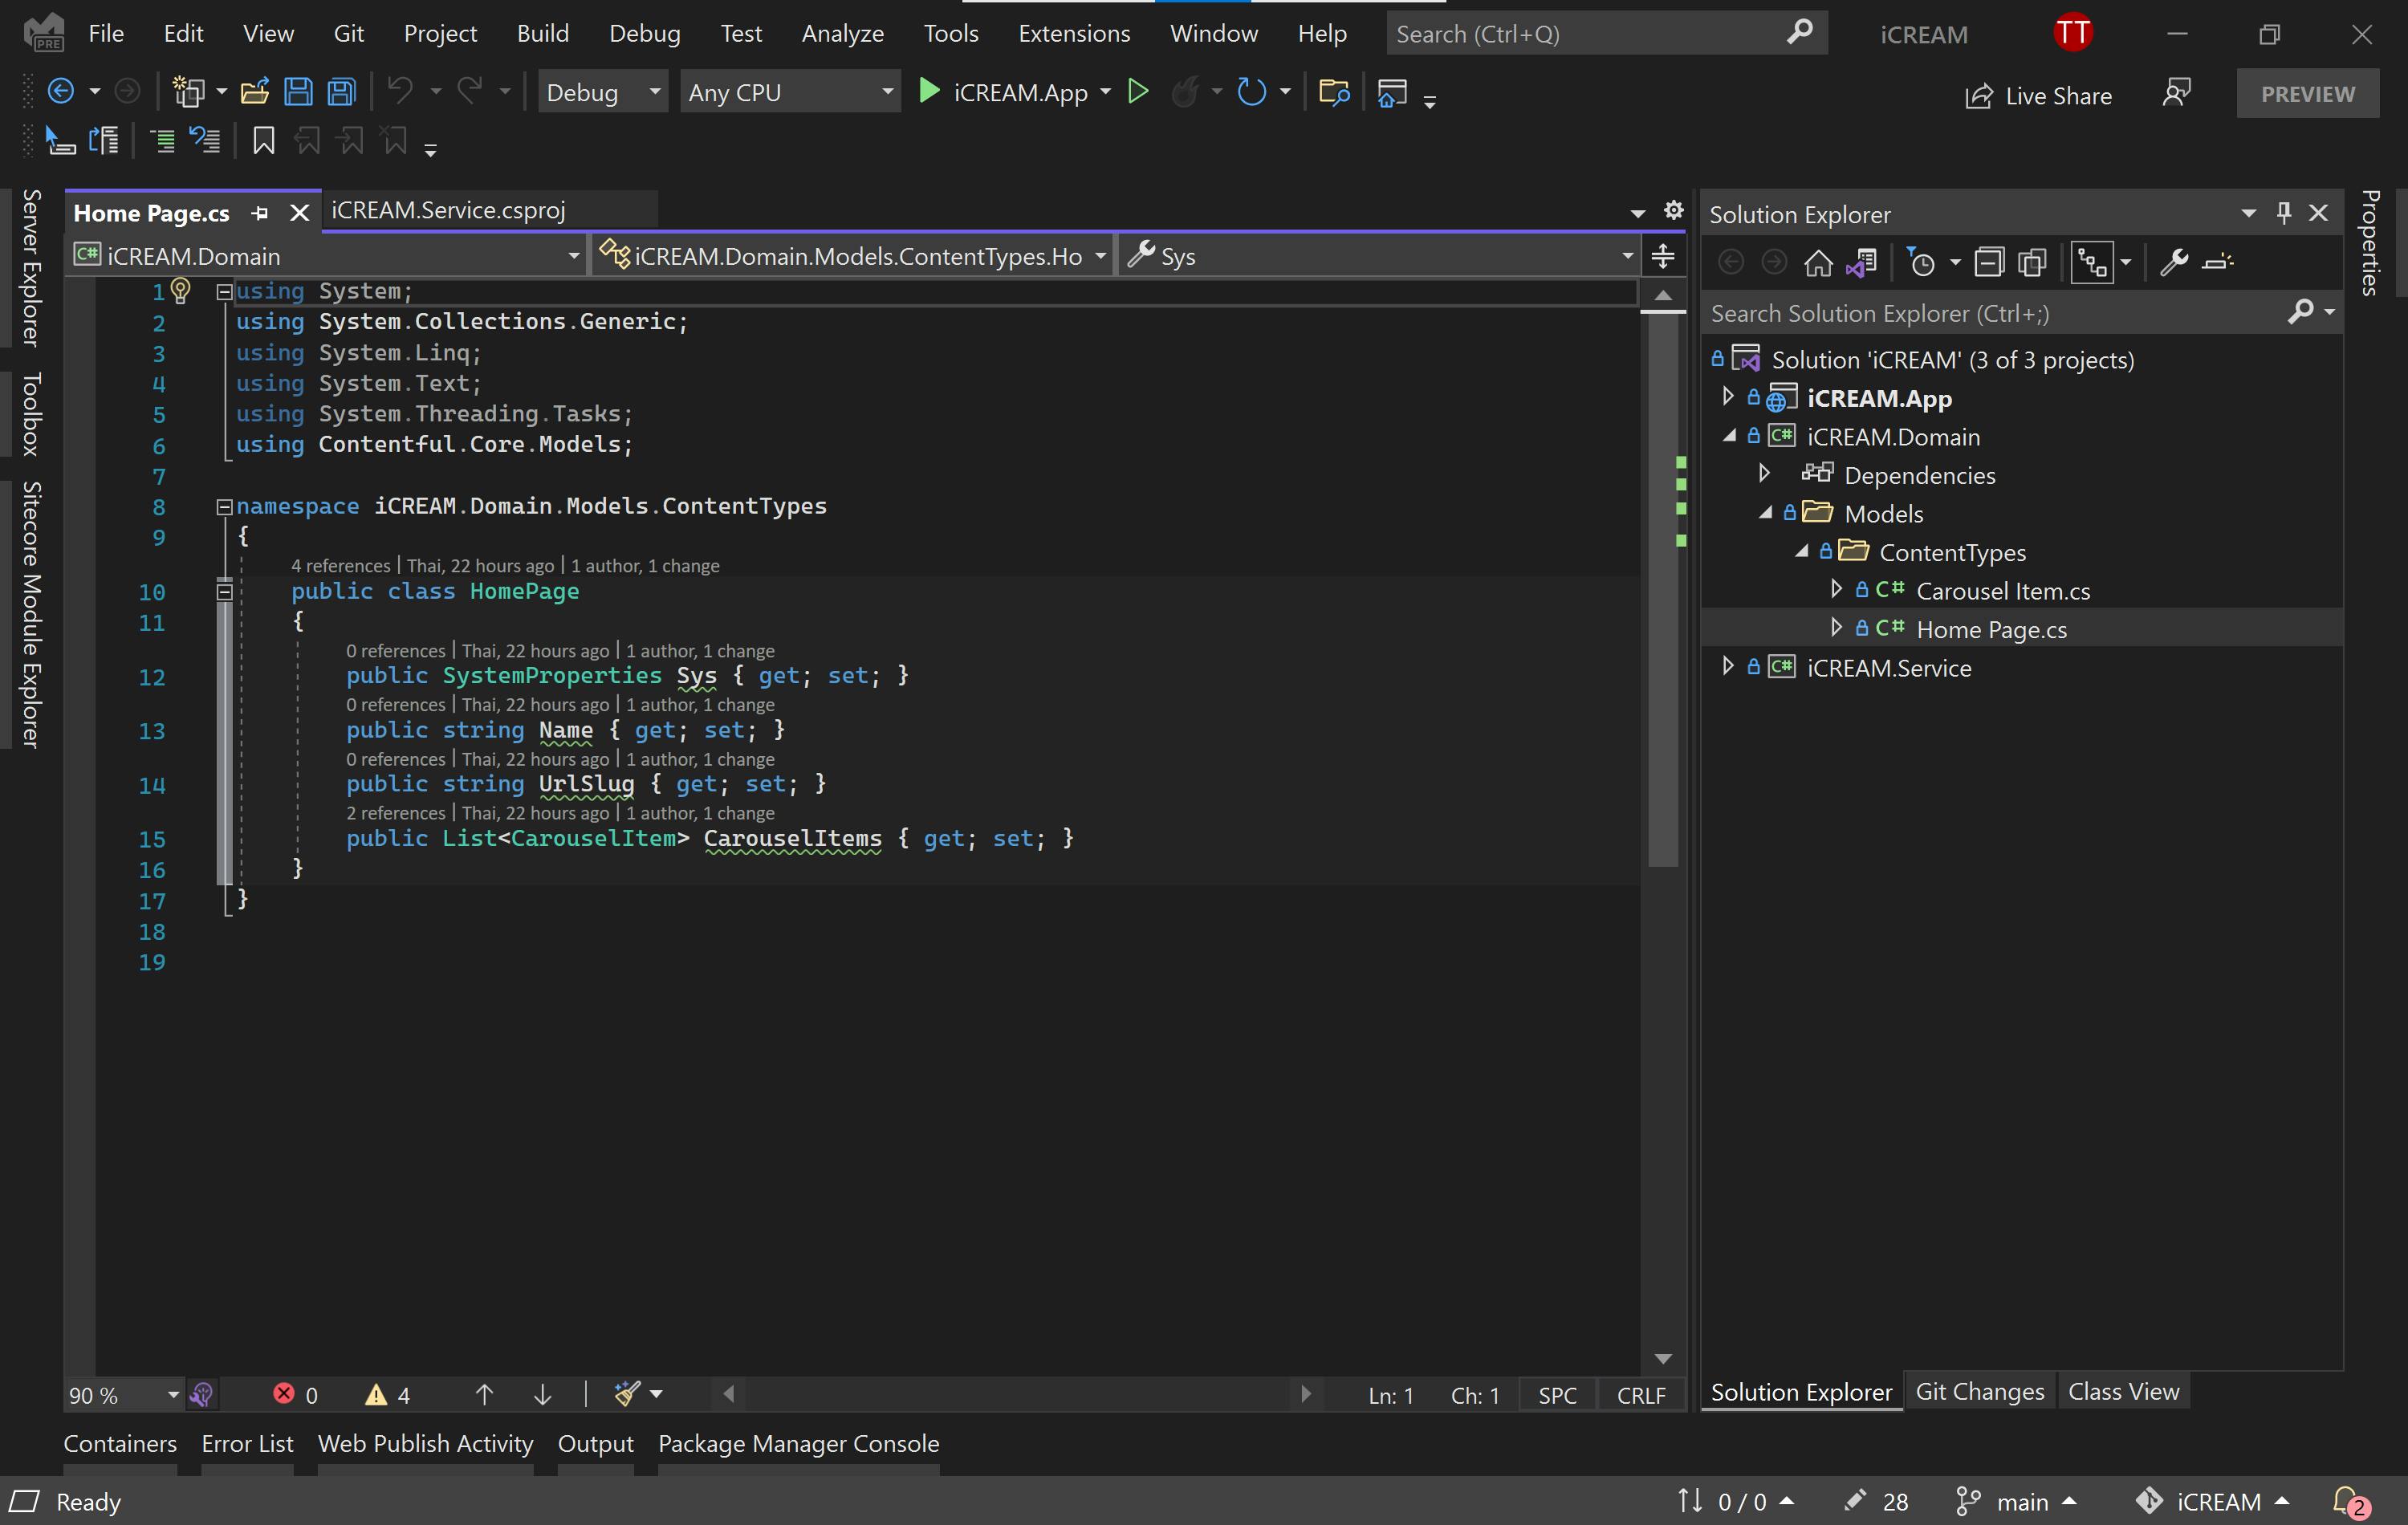
Generate the content models
Developers can install a dotnet tool to generate the content models from Contentful using the following command:
dotnet tool install -g contentful.modelscreator.cli
Then, to use the tool to generate the model, you need to enter the following command:
contentful.modelscreator.cli -s <Space ID> -a <Content Delivery API - access token> -n iCREAM.Domain.Models.ContentTypes -p ..\iCREAM.Domain\Models\ContentTypes\
Remember to replace the Space ID and the Content Delivery API - access token with the values you get from your Contentful settings. This commands will add the content models to your project so that you can use them to get the entries from Contentful:
Let me show you how easy it is to create an instance of the ContentfulClient from the application settings and get the data for the home page:
public class HomePageRepository
{
    private readonly HttpClient httpClient;
    private readonly IConfiguration configuration;

    public HomePageRepository(HttpClient httpClient, IConfiguration configuration)
    {
        this.httpClient = httpClient;
        this.configuration = configuration;
    }

    public async Task<HomePage> GetItemAsync()
    {
        var client = new ContentfulClient(httpClient,
            configuration["ContentfulOptions:DeliveryApiKey"],
            configuration["ContentfulOptions:PreviewApiKey"],
            configuration["ContentfulOptions:SpaceId"],
            bool.Parse(configuration["ContentfulOptions:UsePreviewApi"]));

        var builder = QueryBuilder<HomePage>.New.ContentTypeIs("homePage").FieldEquals("fields.urlSlug", "home");

        return (await client.GetEntries<HomePage>(builder)).FirstOrDefault();   }
  }
Also remember to add the HomePageRepository to your service container in the Program.cs
var builder = WebAssemblyHostBuilder.CreateDefault(args);
builder.RootComponents.Add<App>("#app");
builder.RootComponents.Add<HeadOutlet>("head::after");

builder.Services.AddHttpClient<HomePageRepository>(client => client.BaseAddress = new Uri(builder.HostEnvironment.BaseAddress));

await builder.Build().RunAsync();
Create the appsettings.json
For a Blazor client hosting project, you need to the store appsettings.json in the wwwroot folder so you need to add the following settings to the appsettings.json:
{
  "ContentfulOptions": {
    "DeliveryApiKey": "<Delivery API Key - access token>",
    "PreviewApiKey": "<Preview API Key - access token>",
    "SpaceId": "<Space ID>",
    "UsePreviewApi": "true"
  }
}
The PreviewApiKey is only required for the preview site. On the production site, the DeliveryApiKey will be used.
Storing settings in the appsettings.json is insecure as this file will be downloaded to the clients. You should not store any sensitive settings in the appsettings.json. Read this article for more information.
You can now start using the app settings by injecting the IConfiguration as shown in the HomePageRepository.
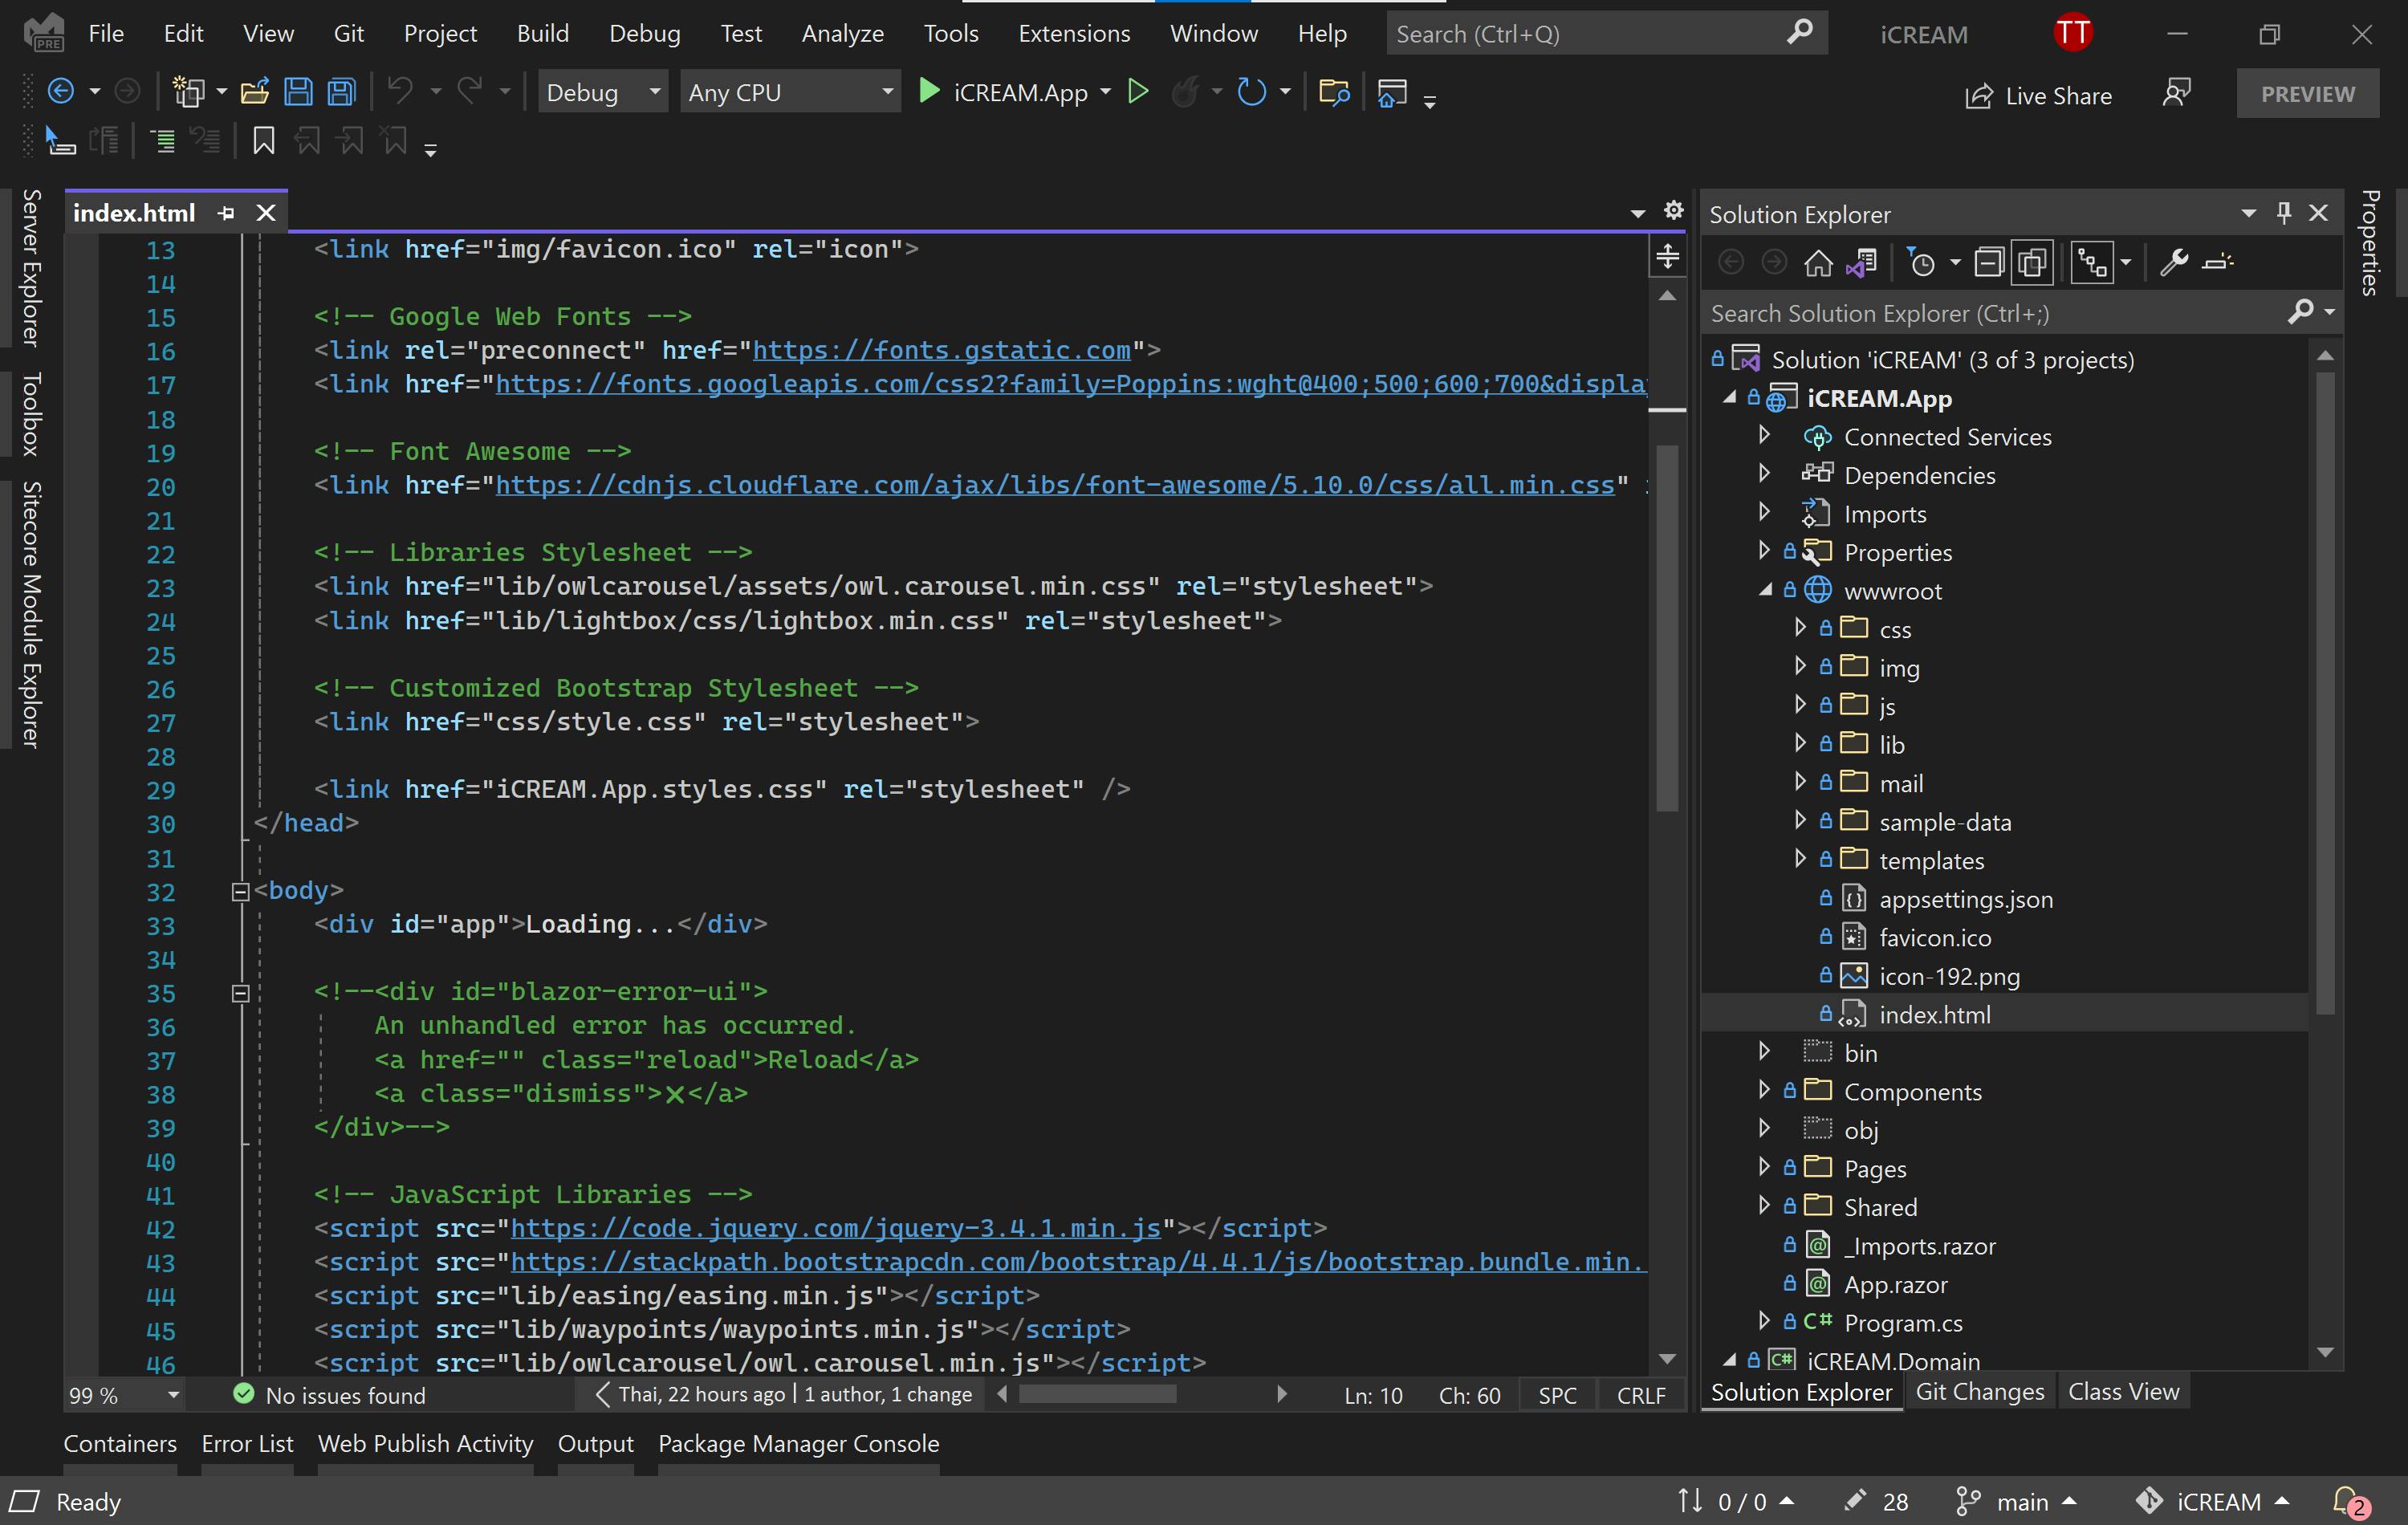
Add Blazor components
Place your static resources in the wwwroot folder and reference them from the index.html and don't remove the <div id="app"> from the body as it is where the components will be rendered:
You can also add the scaffolding elements to the MainLayout.razor so that they can be shared by all pages. Use @Body to add the placeholder:
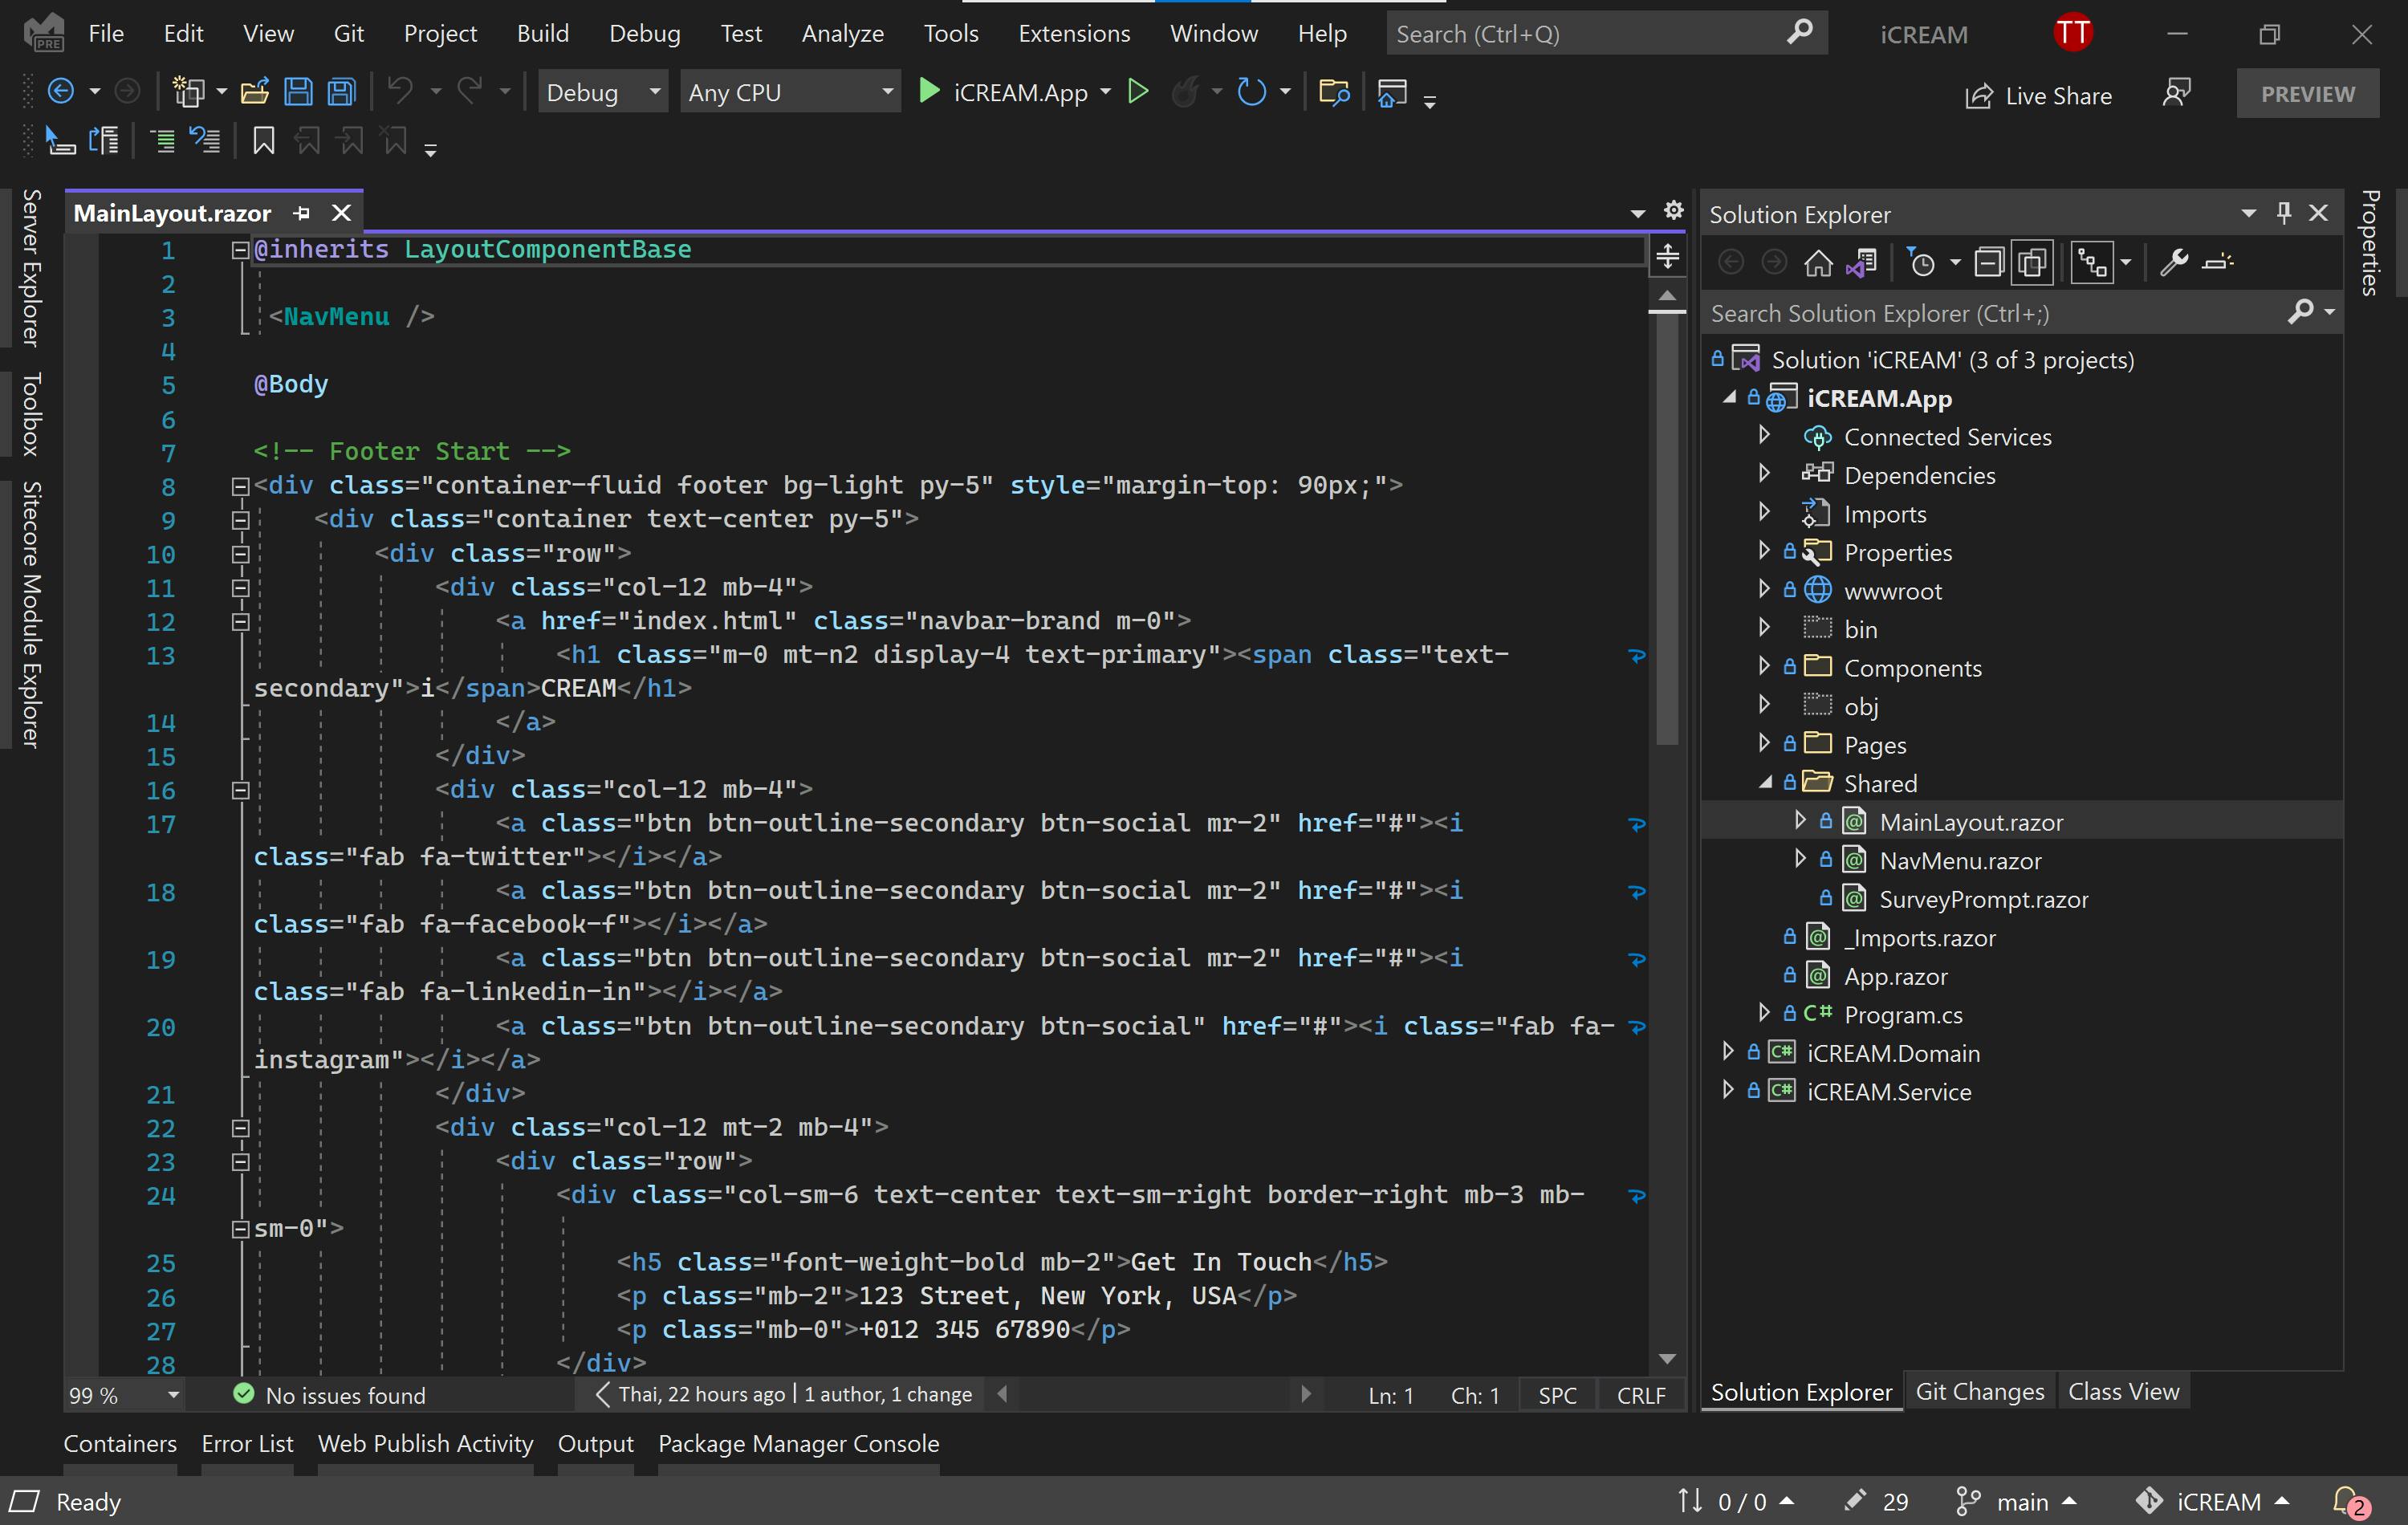
You can also add the markup for the navigation to the NavMenu.razor component and use <NavMenu /> to add it to the MainLayout.razor.
Below is how I add components to the home page:
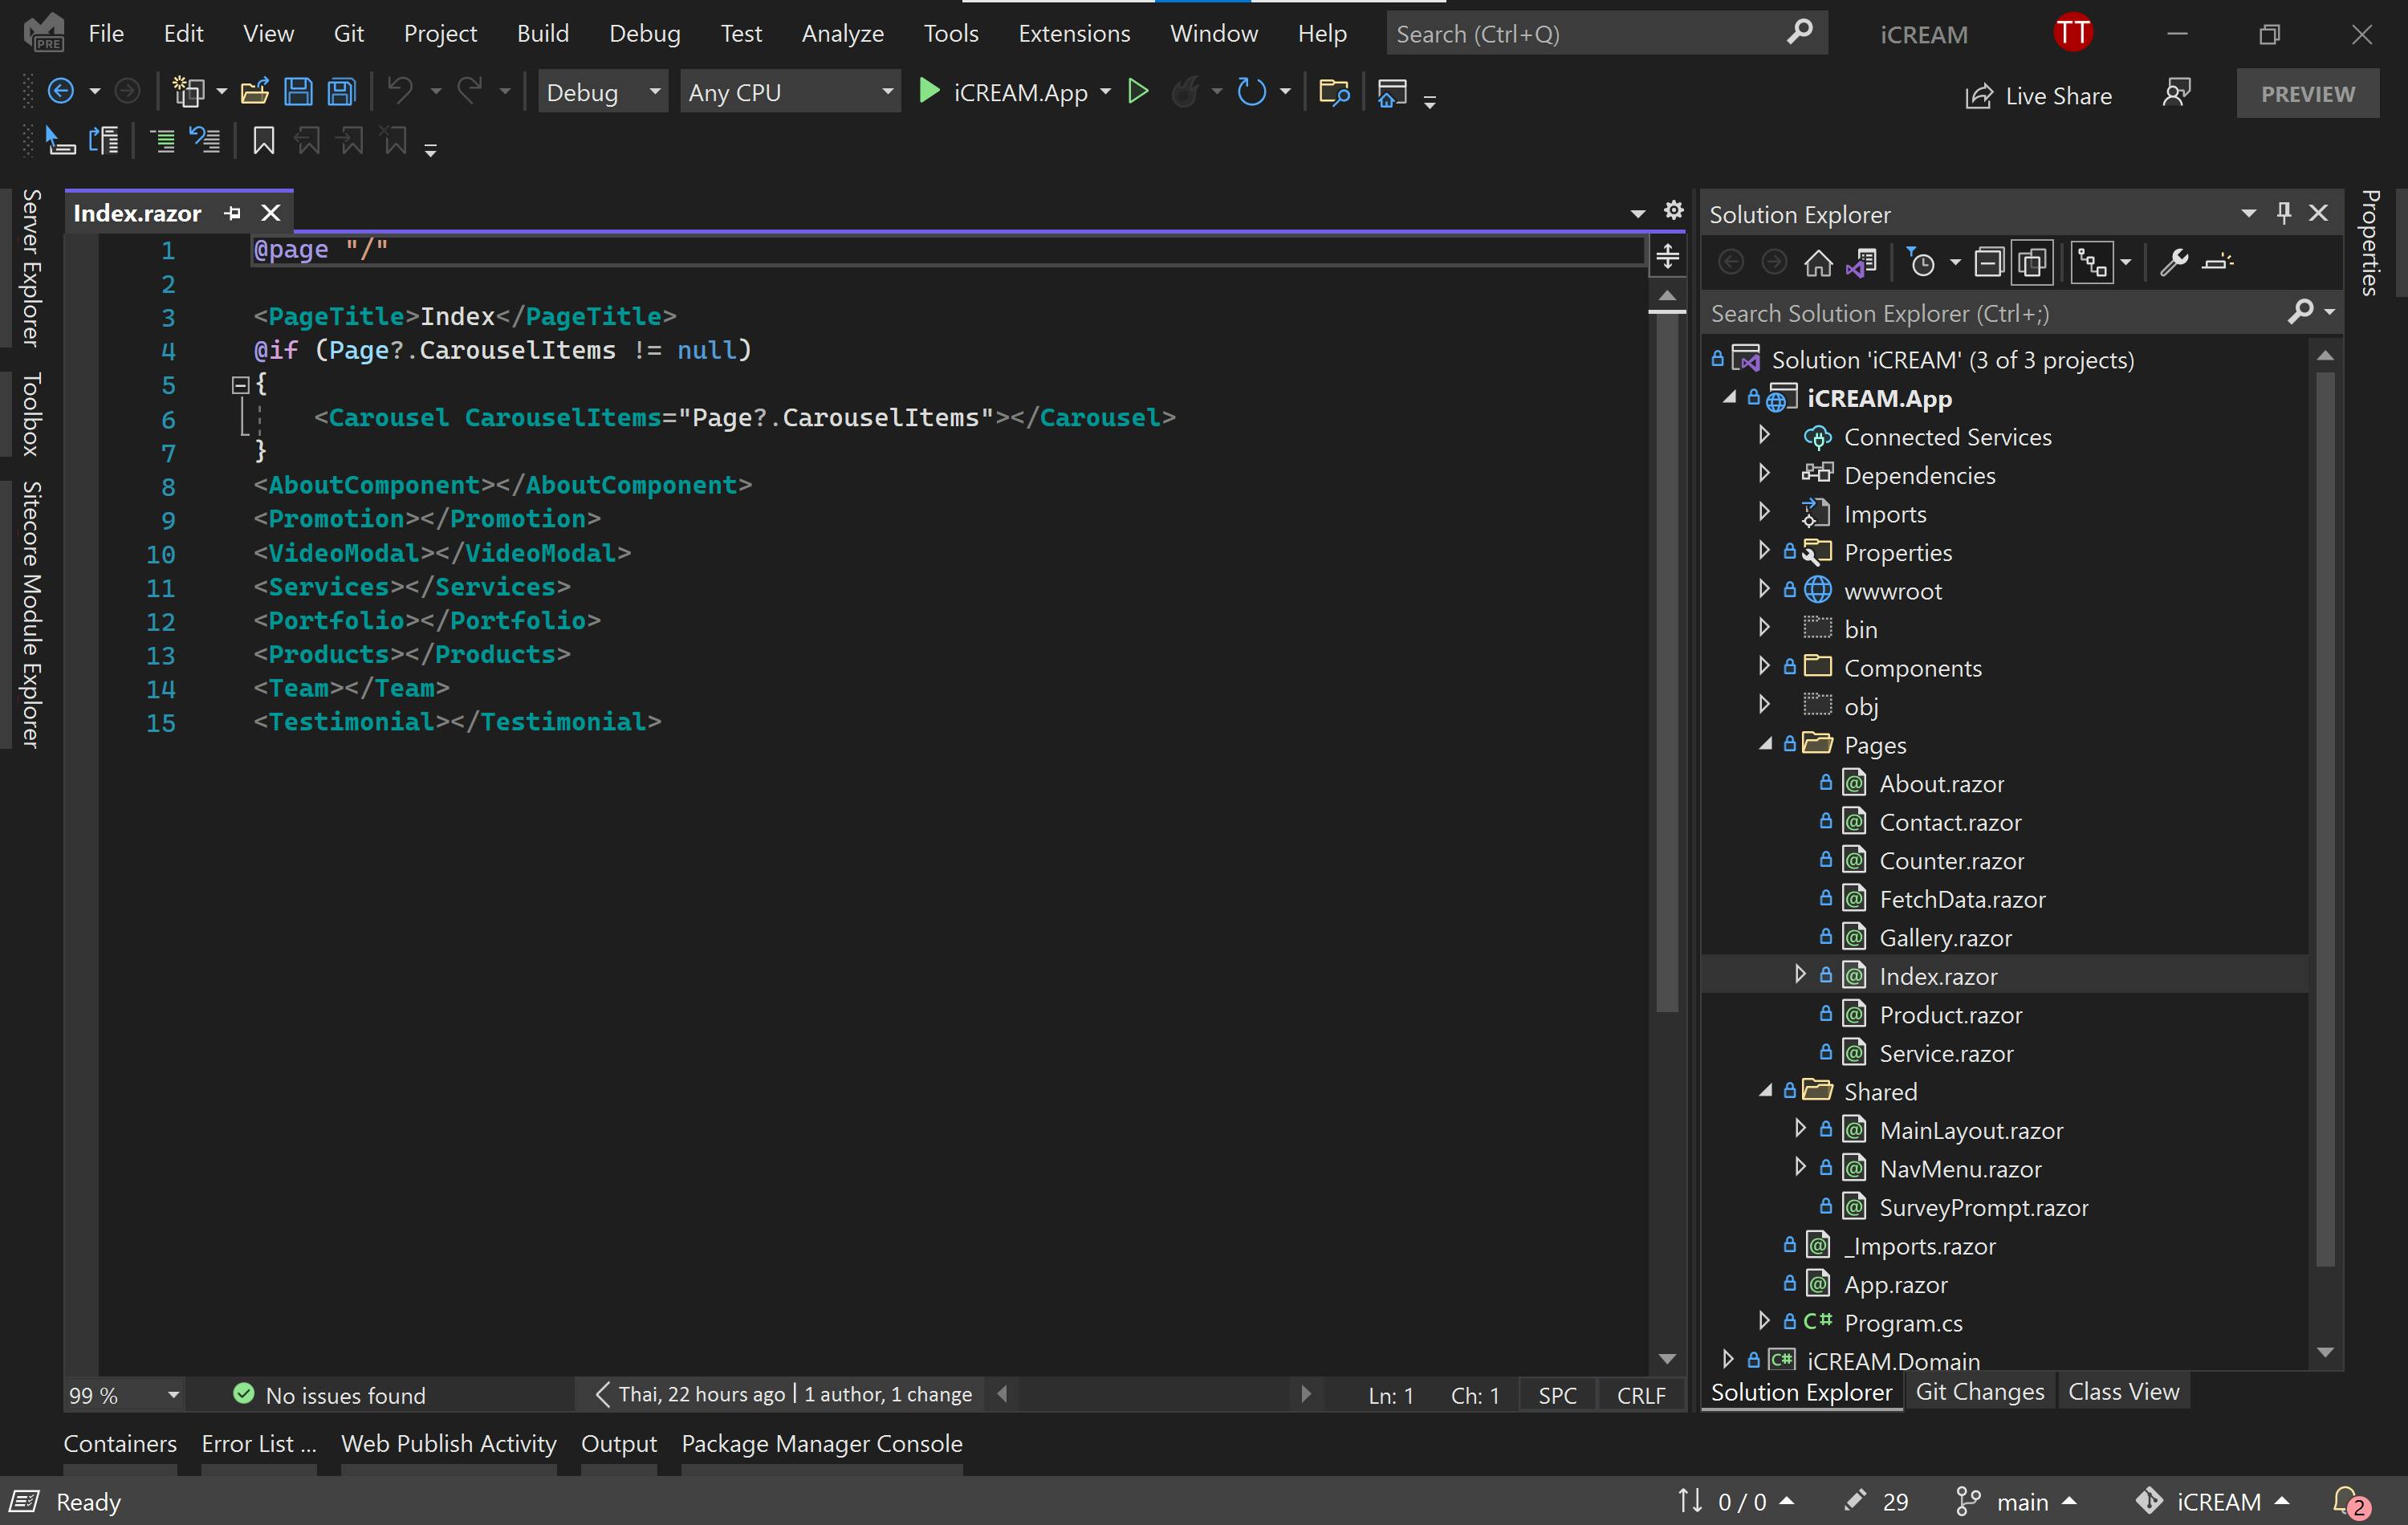
I use @page "/" to map the home page URL to this page razor component. I also pass the Page.CarouselItems as a parameter to the Carousel component.
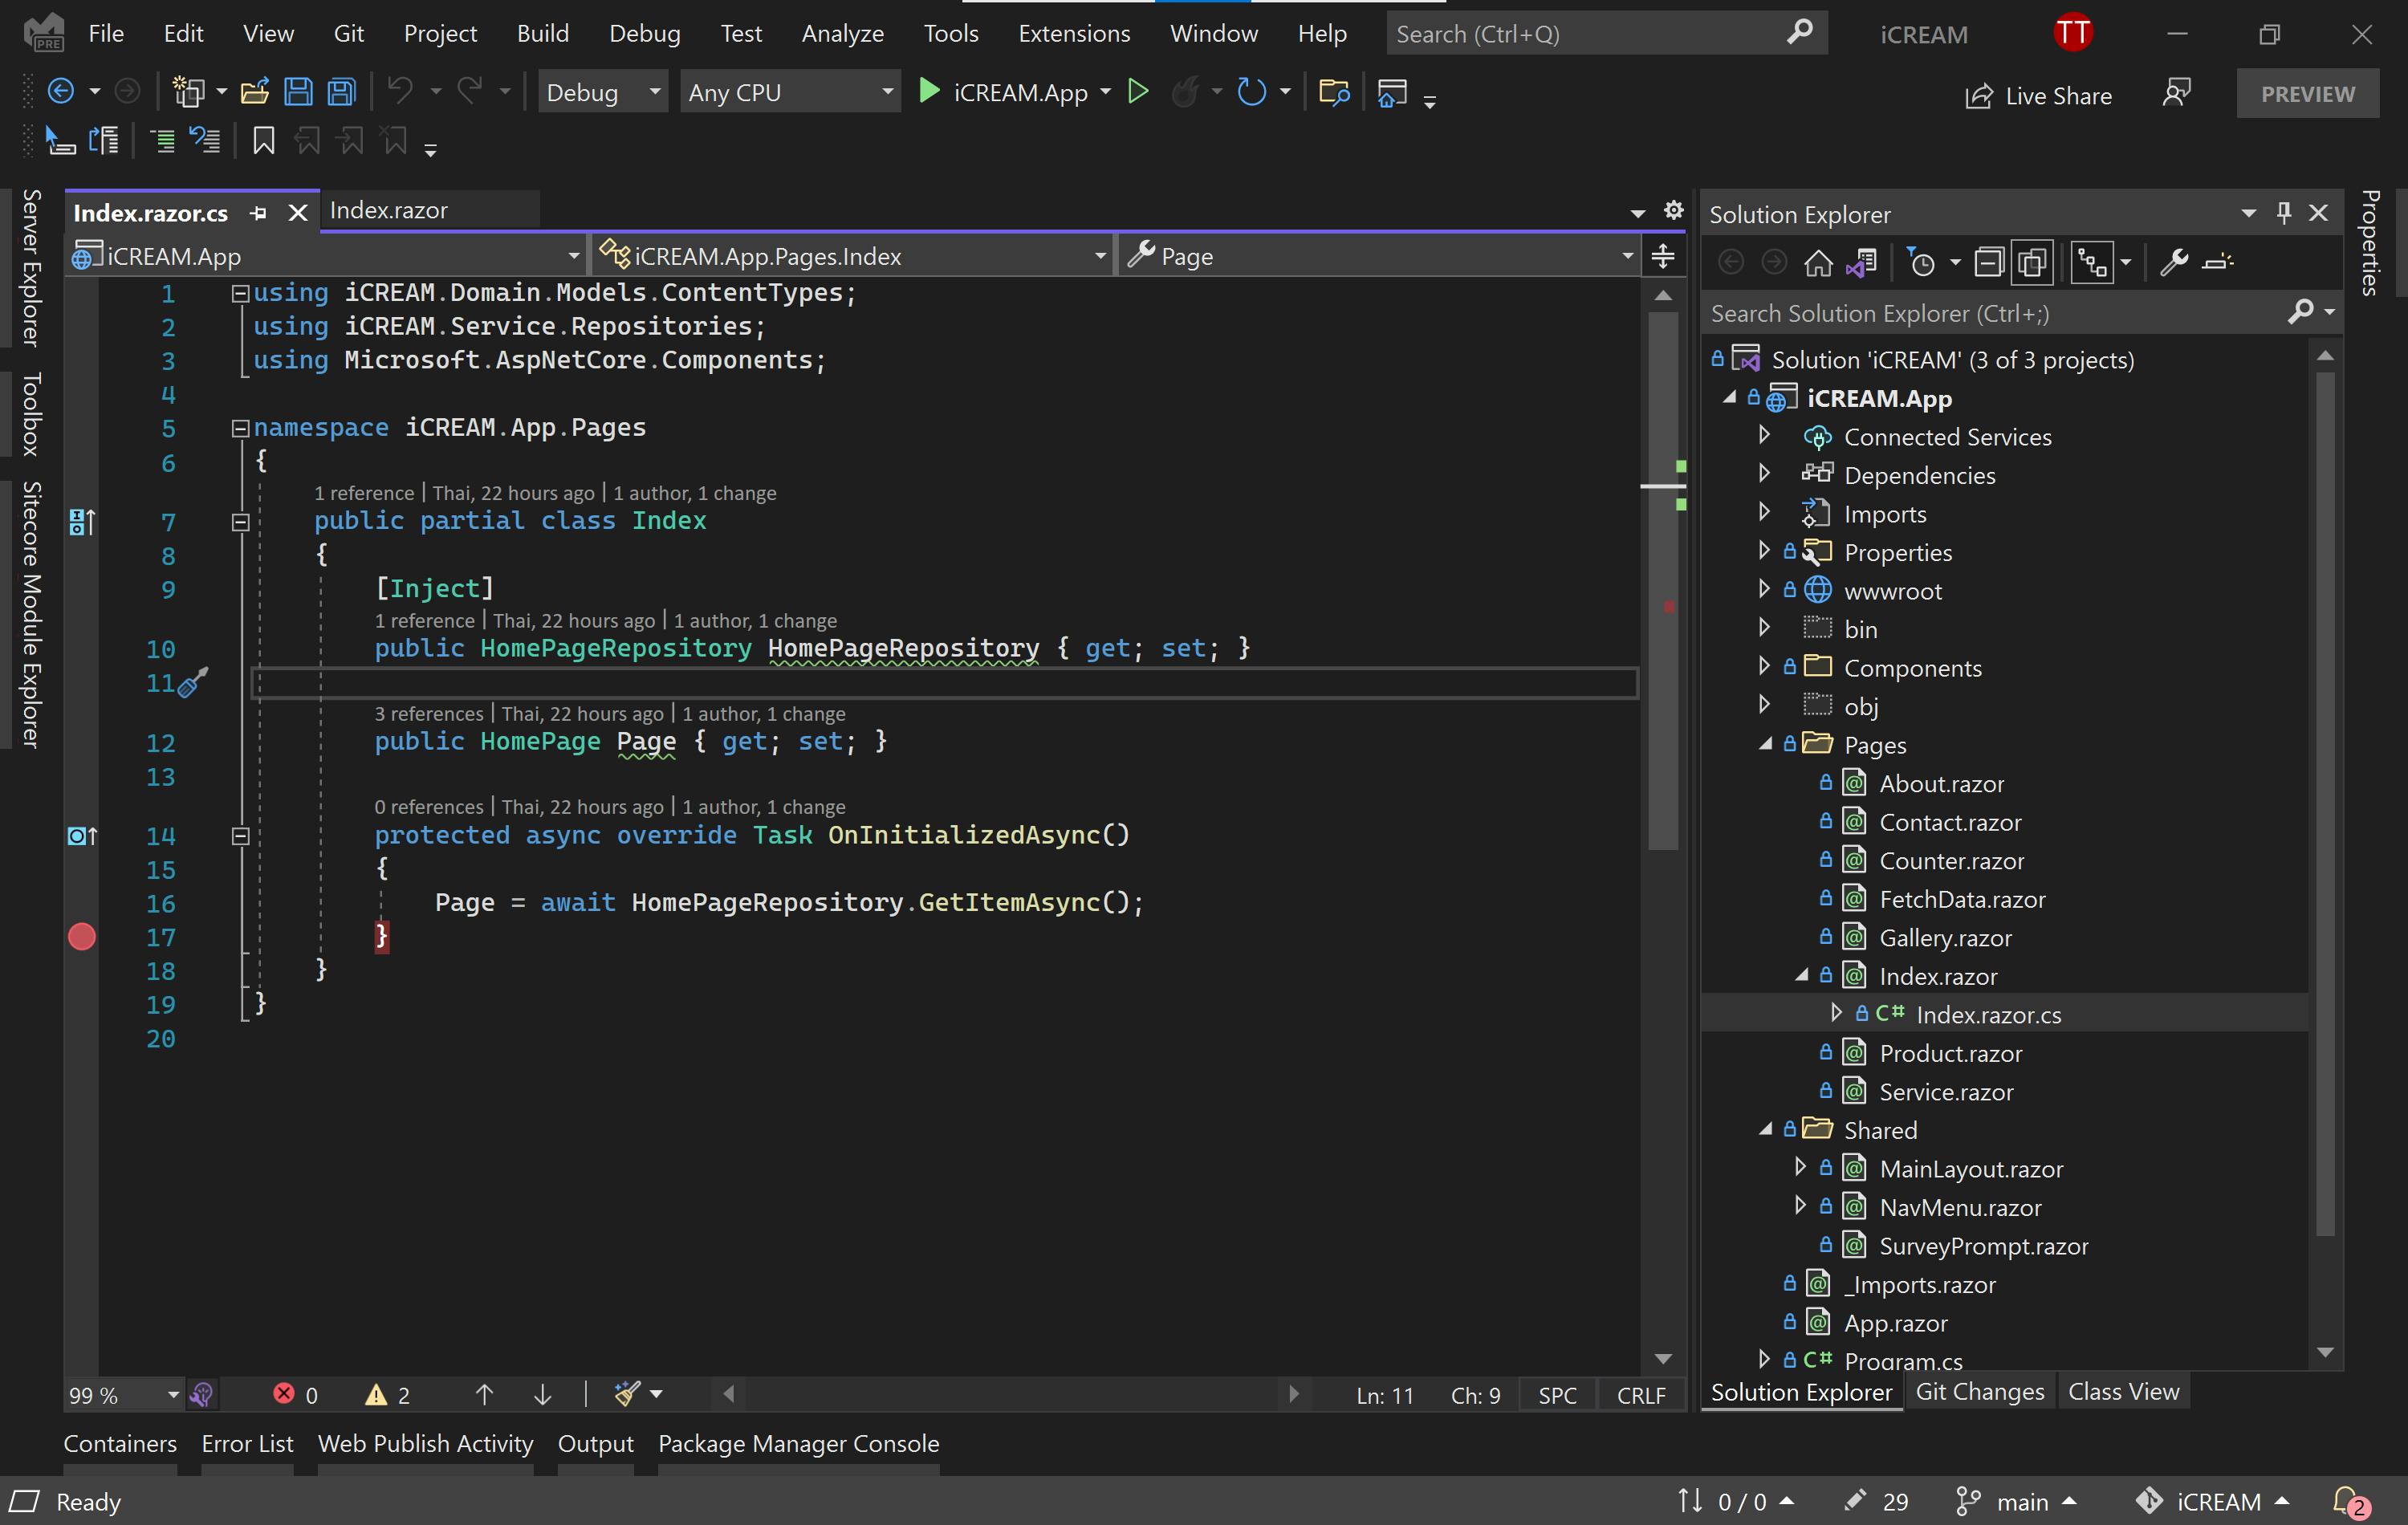
Take a look at the Index.razor.cs file to see how I get the data for the home page from the HomePageRepository and notice that I can use [Inject] to inject the dependency from the component class.
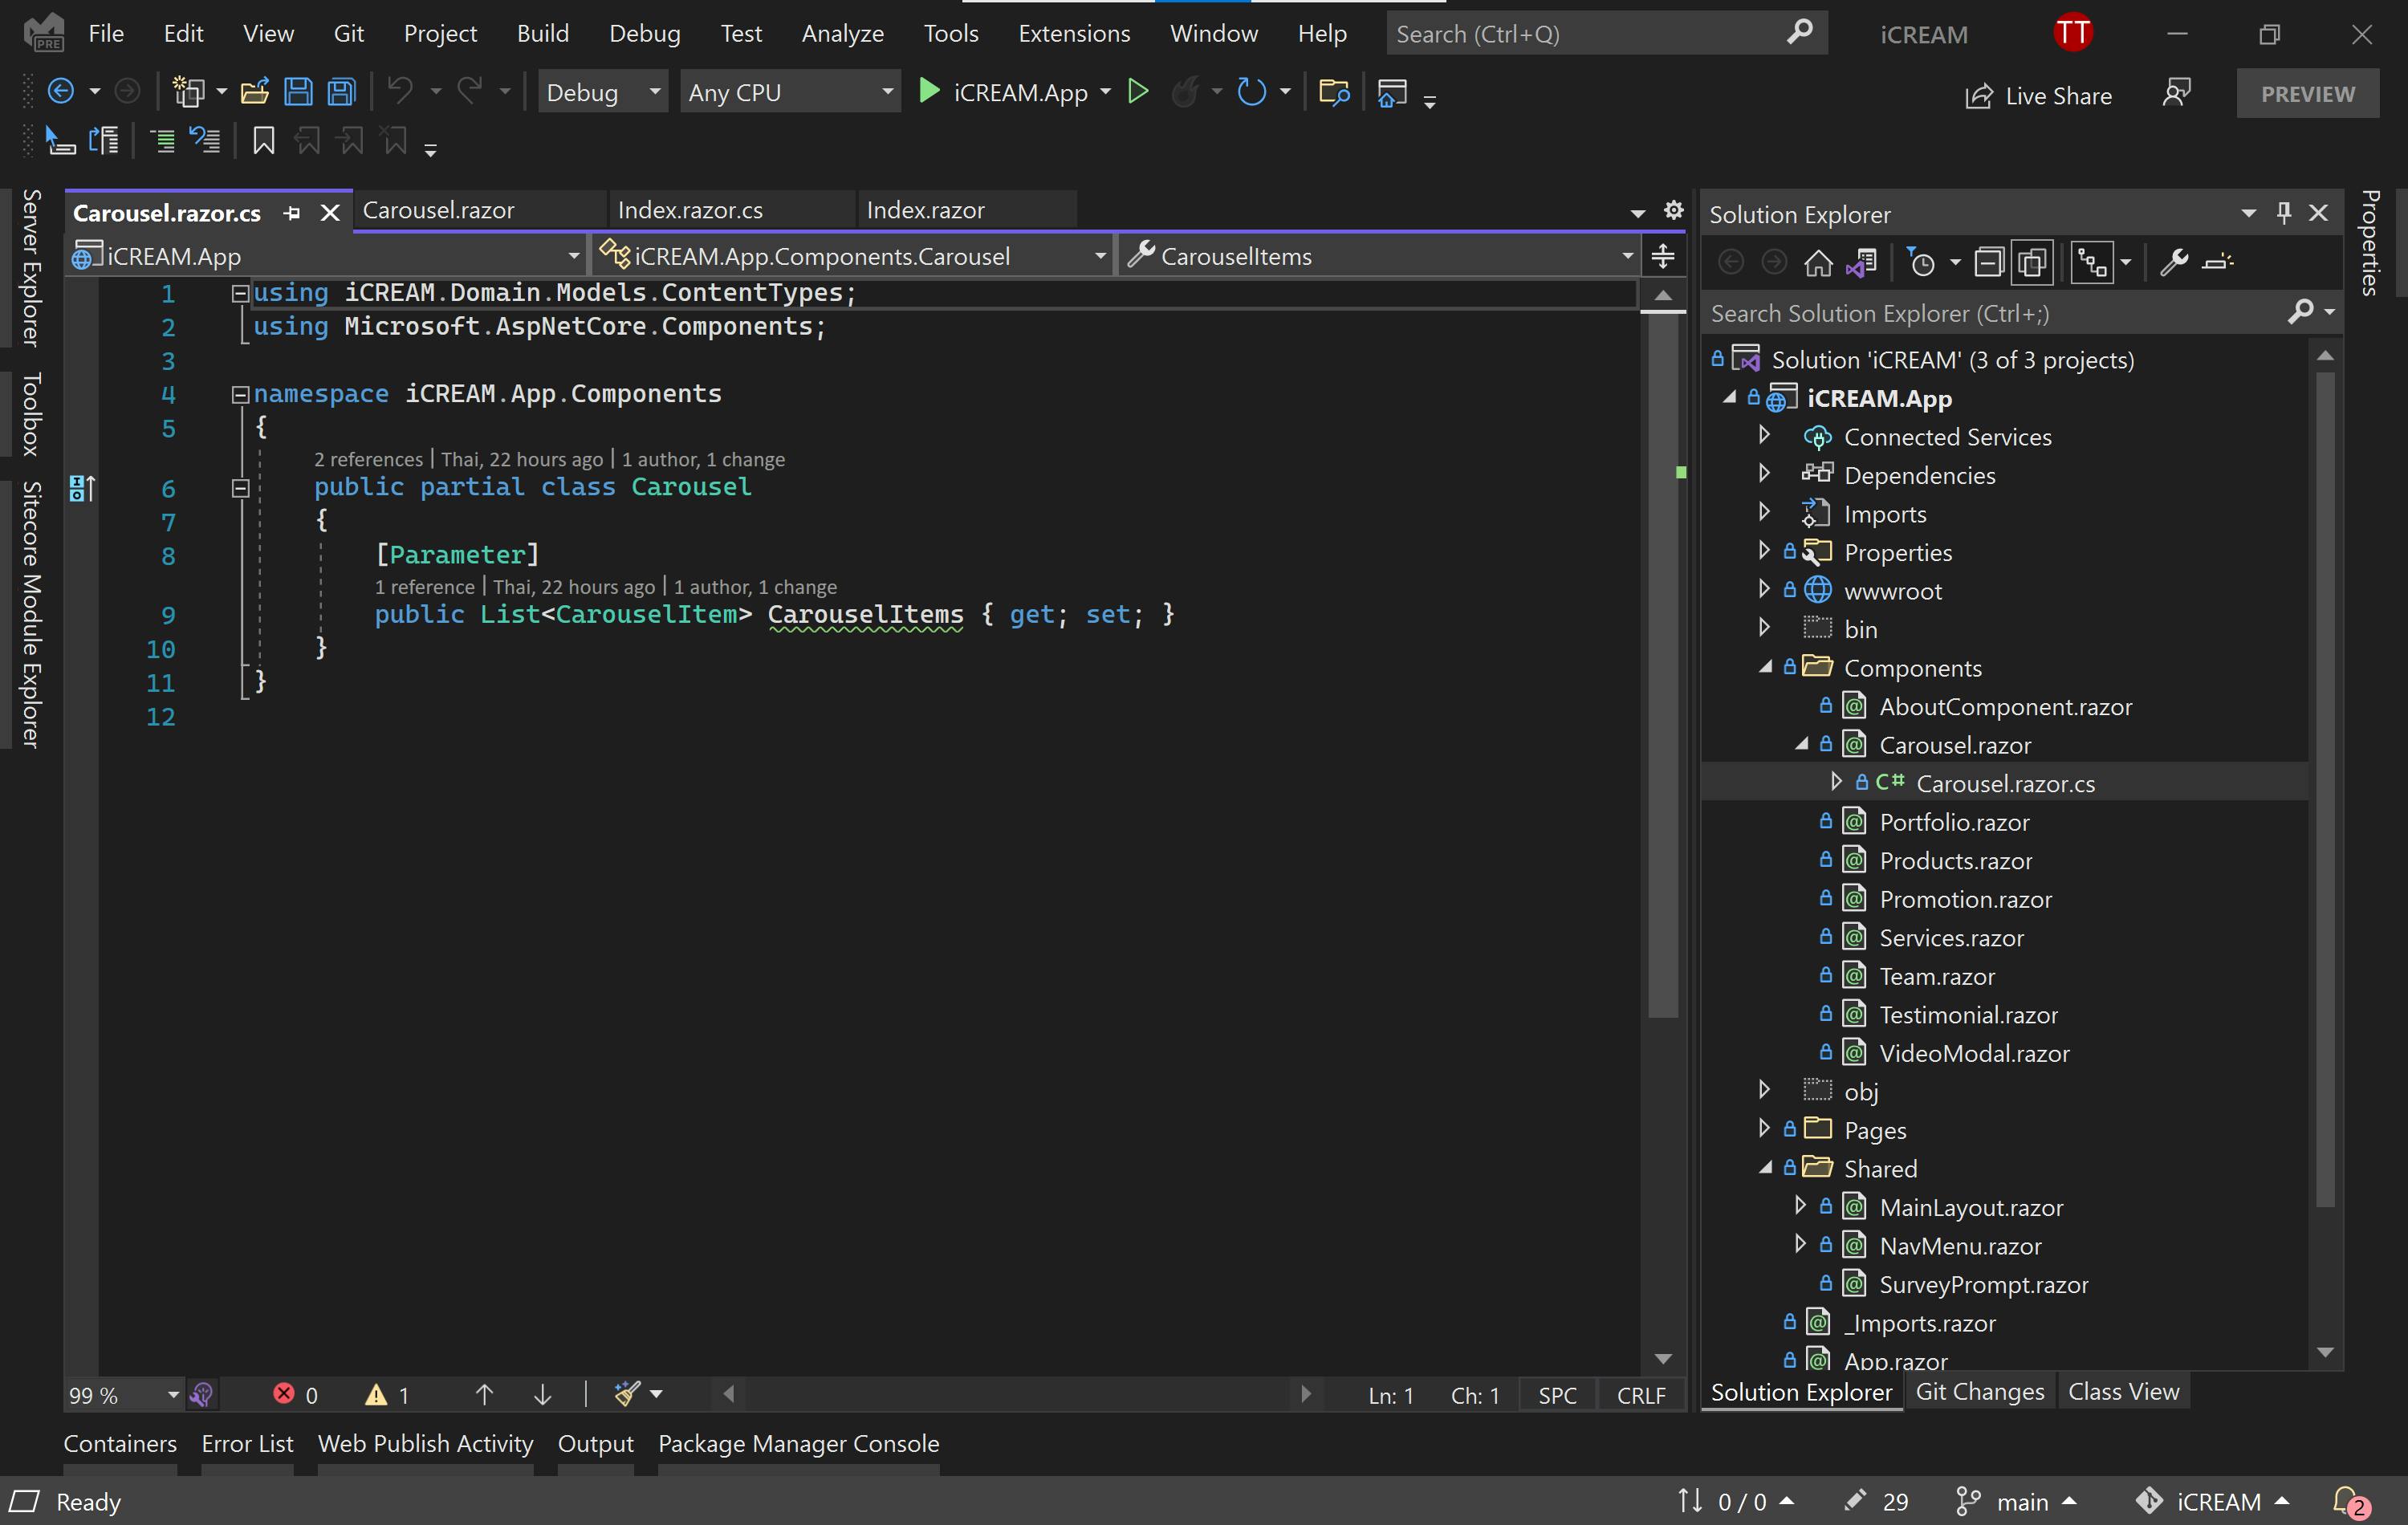
Also, check out the Carousel.razor.cs to learn how to get the parameter from the Carousel component:
Let's commit and push your code to a Github repo and deploy your Blazor app to the Azure Static Web App.
Deploy your app
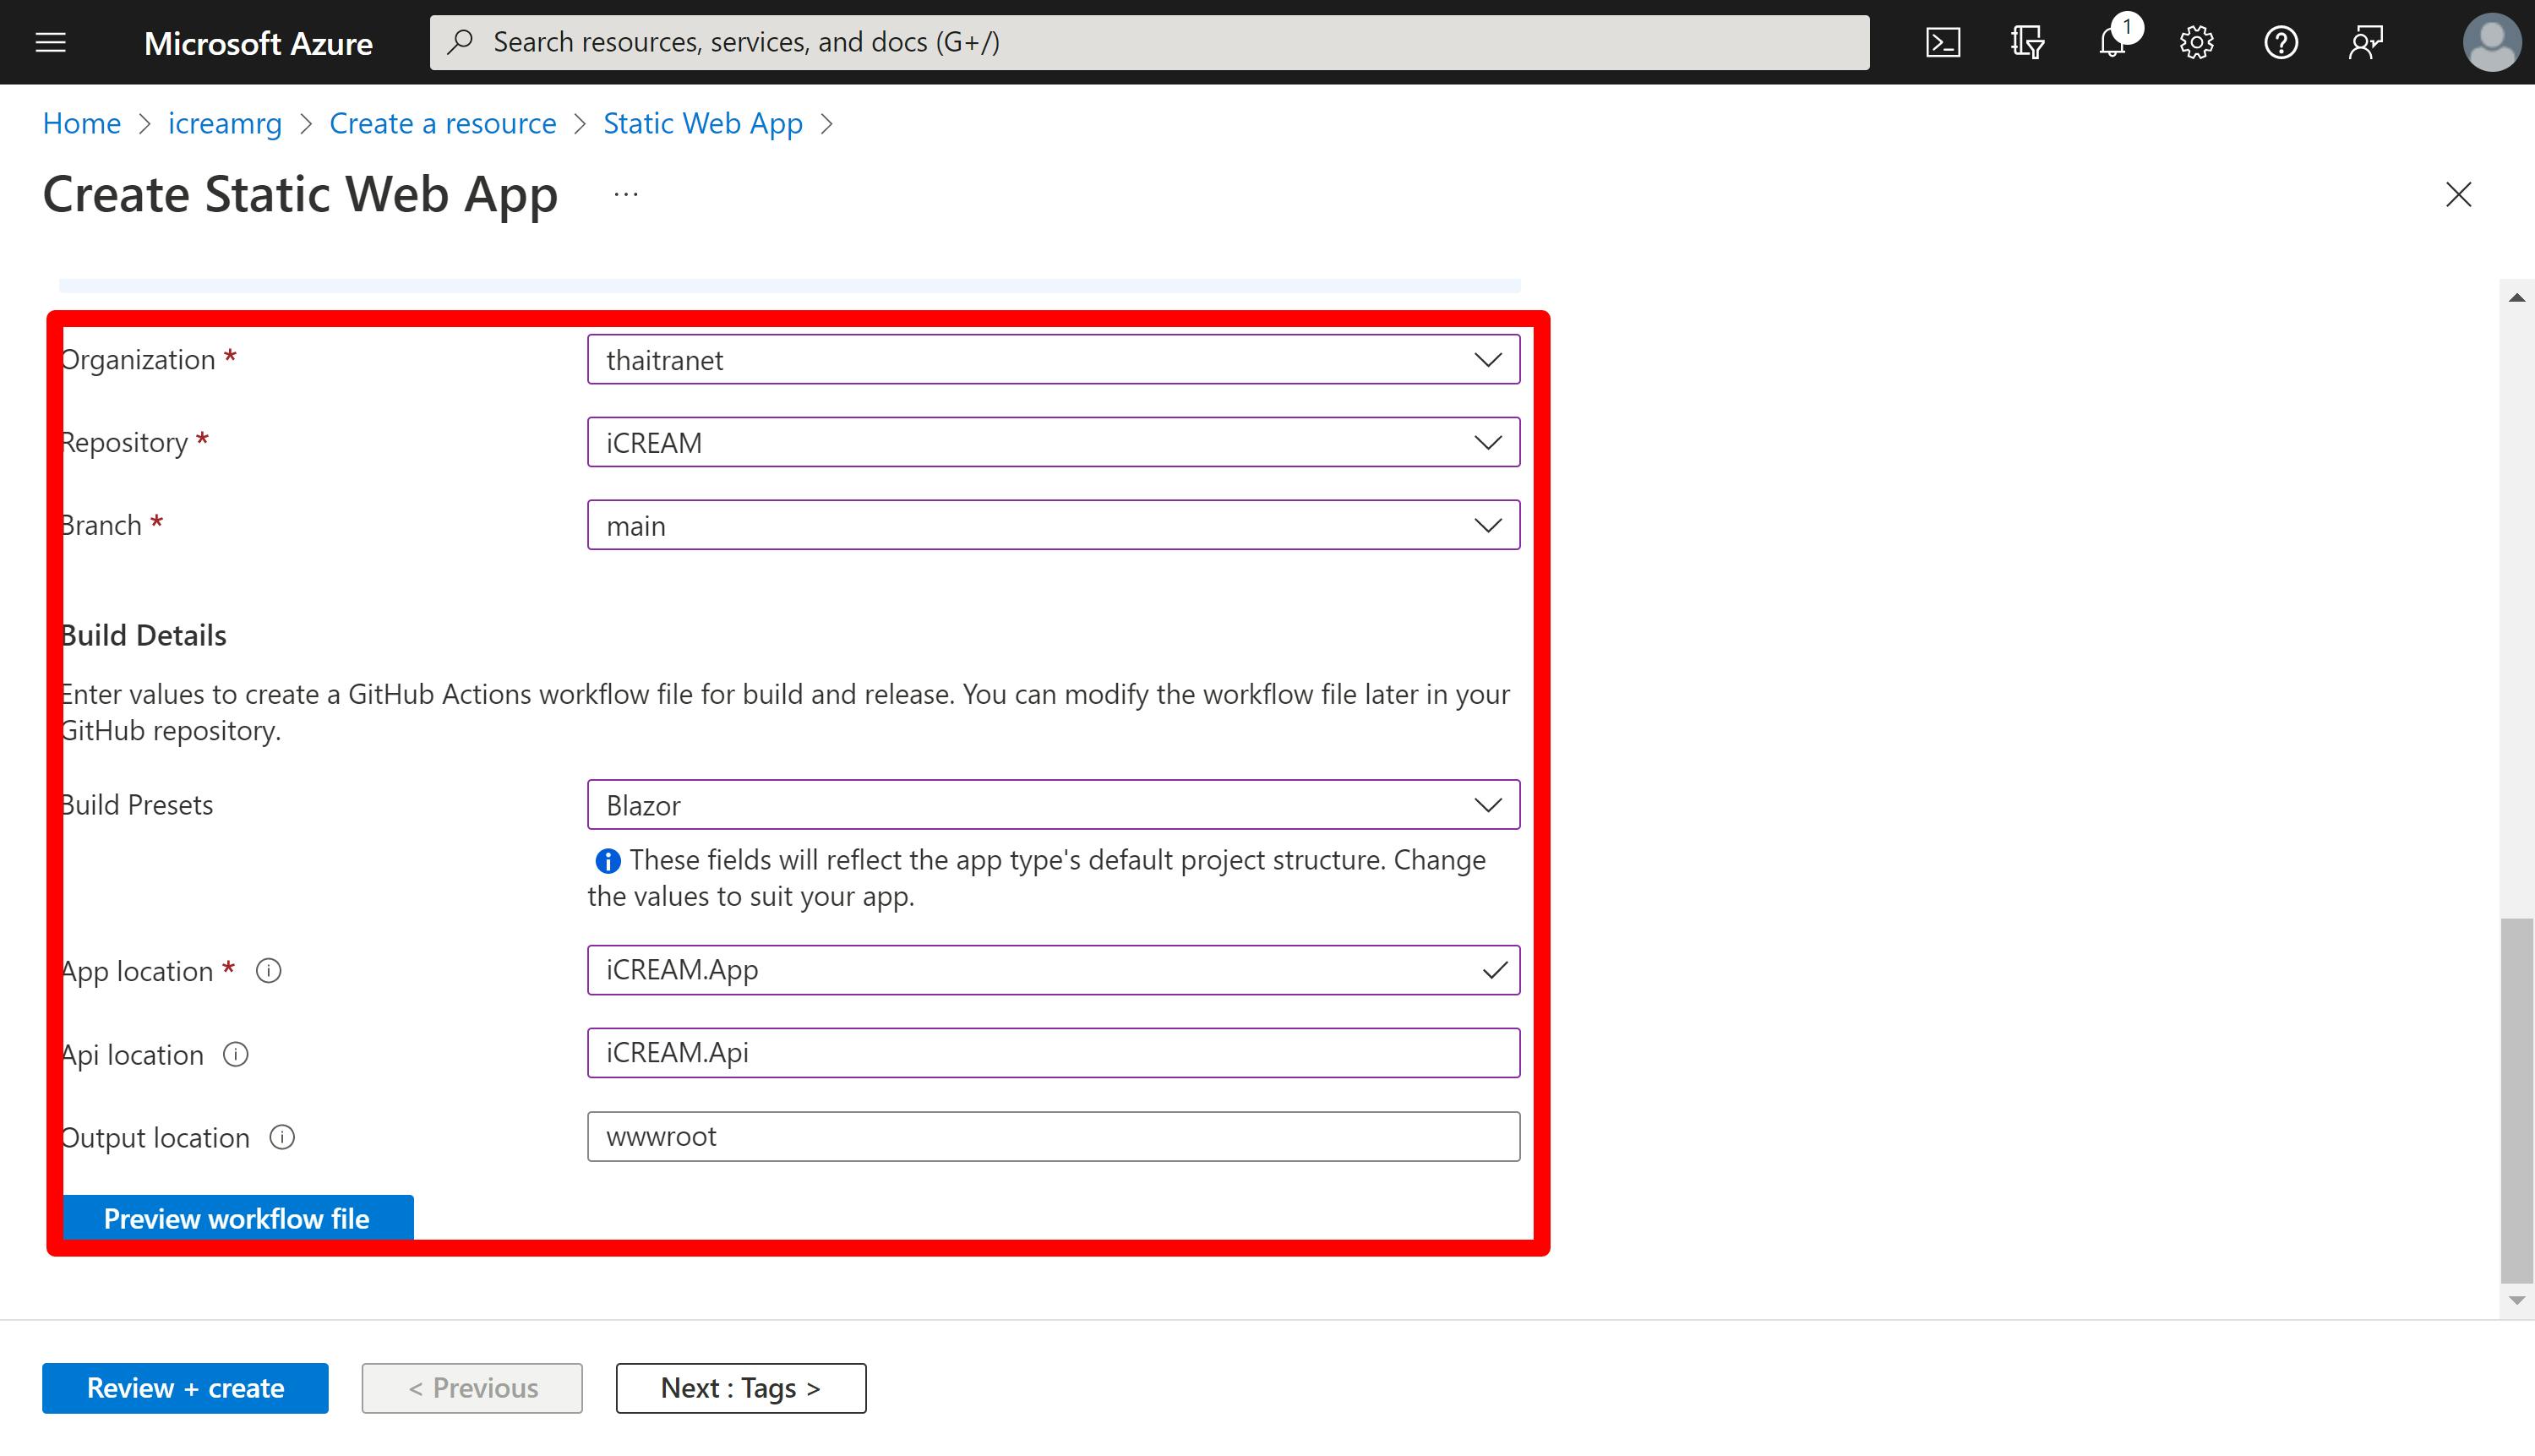
Deploying a Blazor app to Azure Static Web App is pretty straightforward. After creating a new resource group in the Azure Portal, you can create a new Static Web App from the marketplace.
You can choose a Free plan type for a non-product project. Make sure the following deployment details are set up correctly:
- Source: Choose Github
- Github account: Connect to your Github account
- Organization: Choose from your Github account
- Repository: Choose from your Github account
- Branch: Choose from your Github repository
- Build Presets: Choose Blazor
- App location: For example, iCREAM.App
- Api location: For example, iCREAM.Api
- Output location: wwwroot
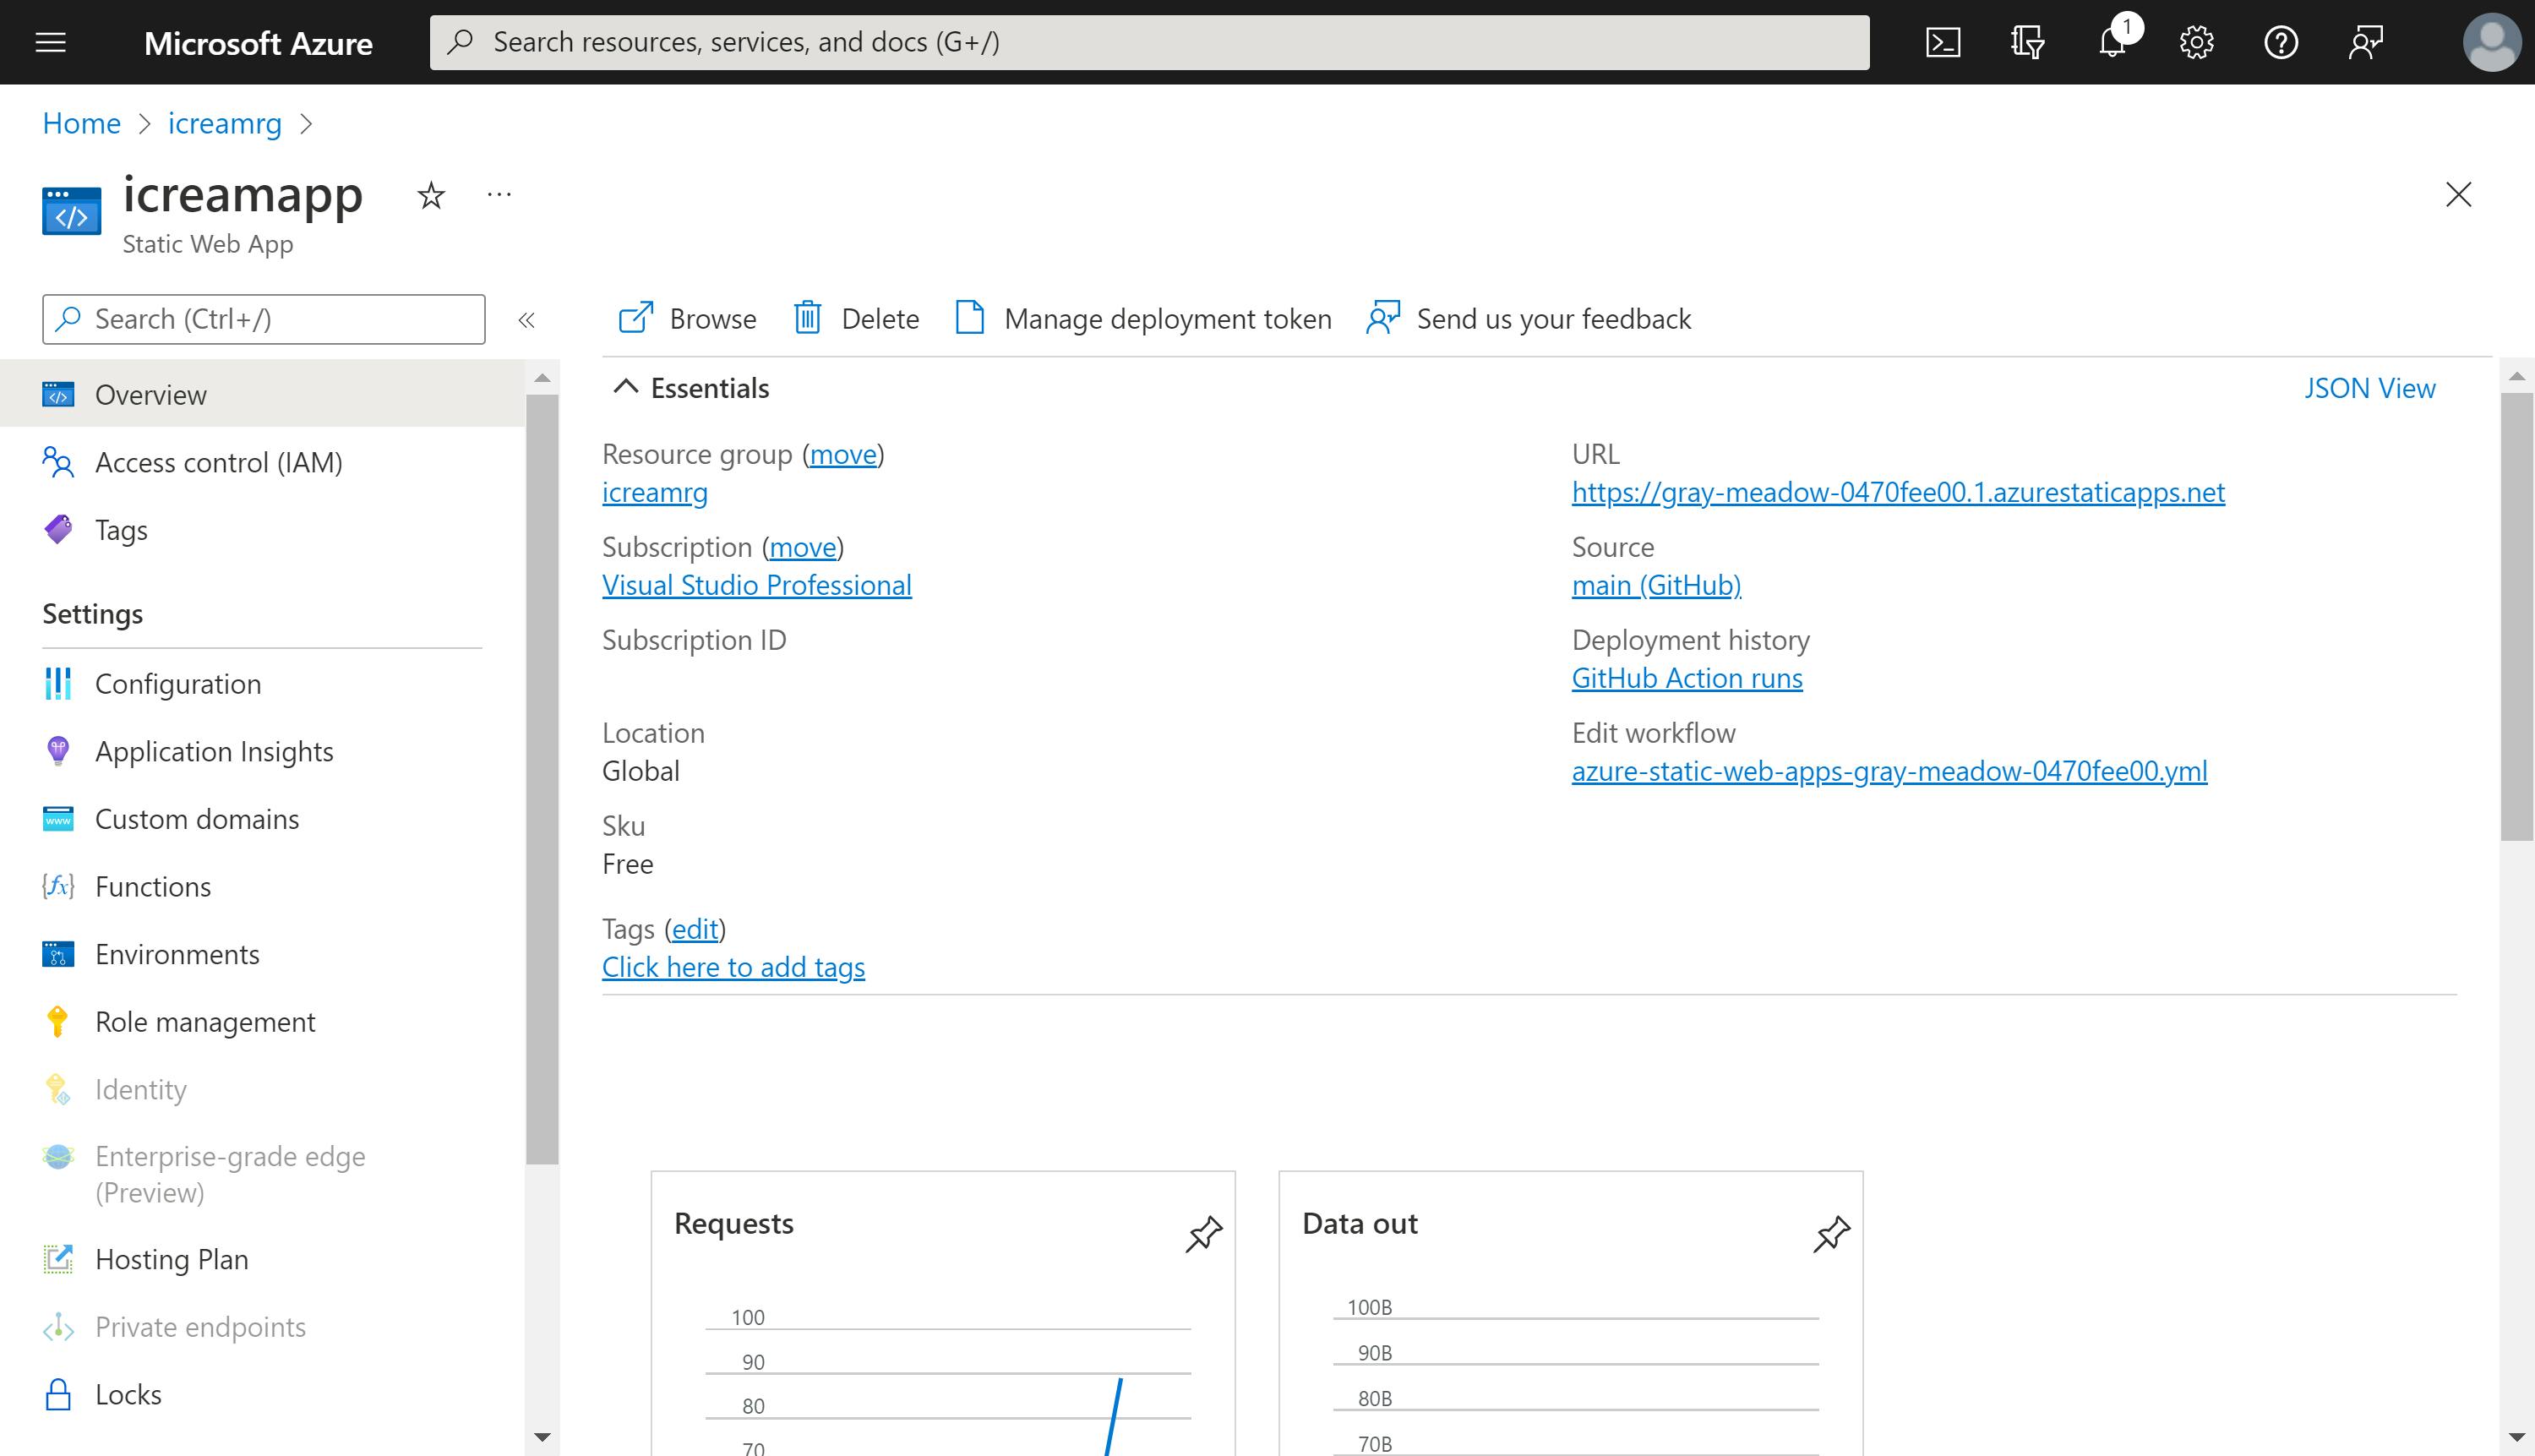
Click Review + create and wait for the deployment to finish. Then, go to the resource page and click the URL link to open your Blazor in a new tab:
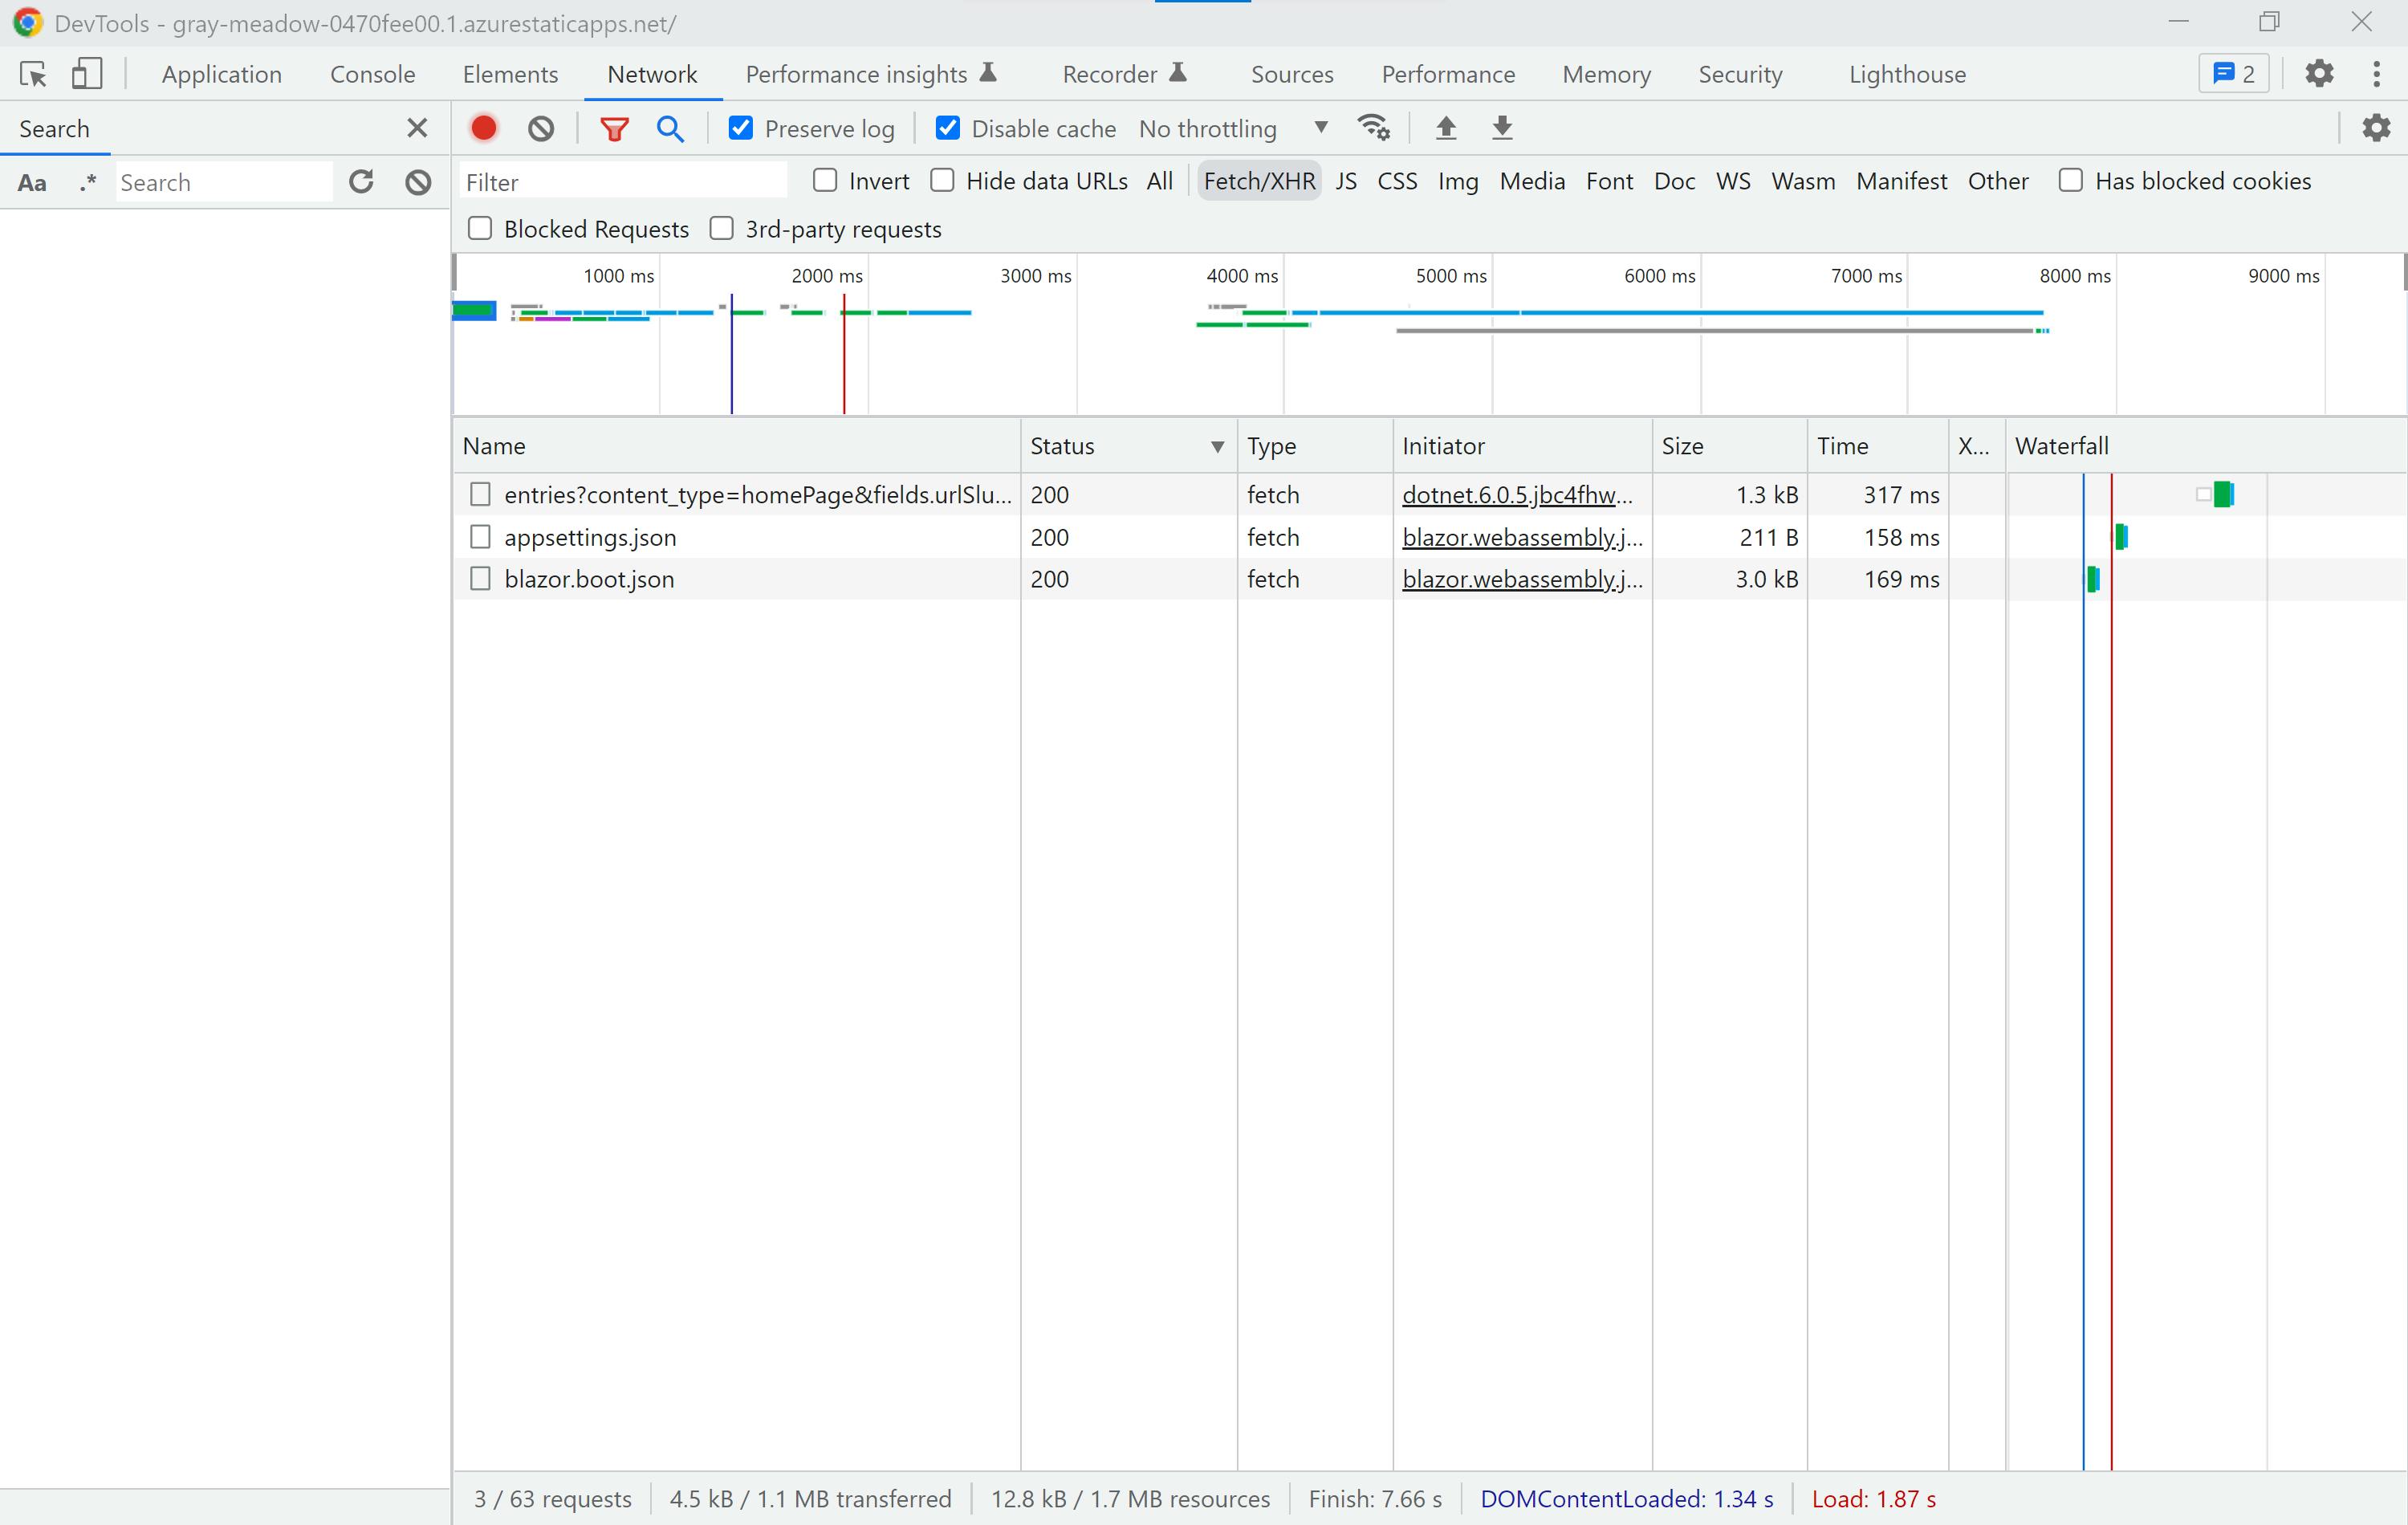
You should navigate to different pages to see how fast your website is. You should also open the DevTools to inspect the get entries call is made to get data from Contentful from within the browser:
If you go to Contentful and update the content now, you will see your changes appear on the website.
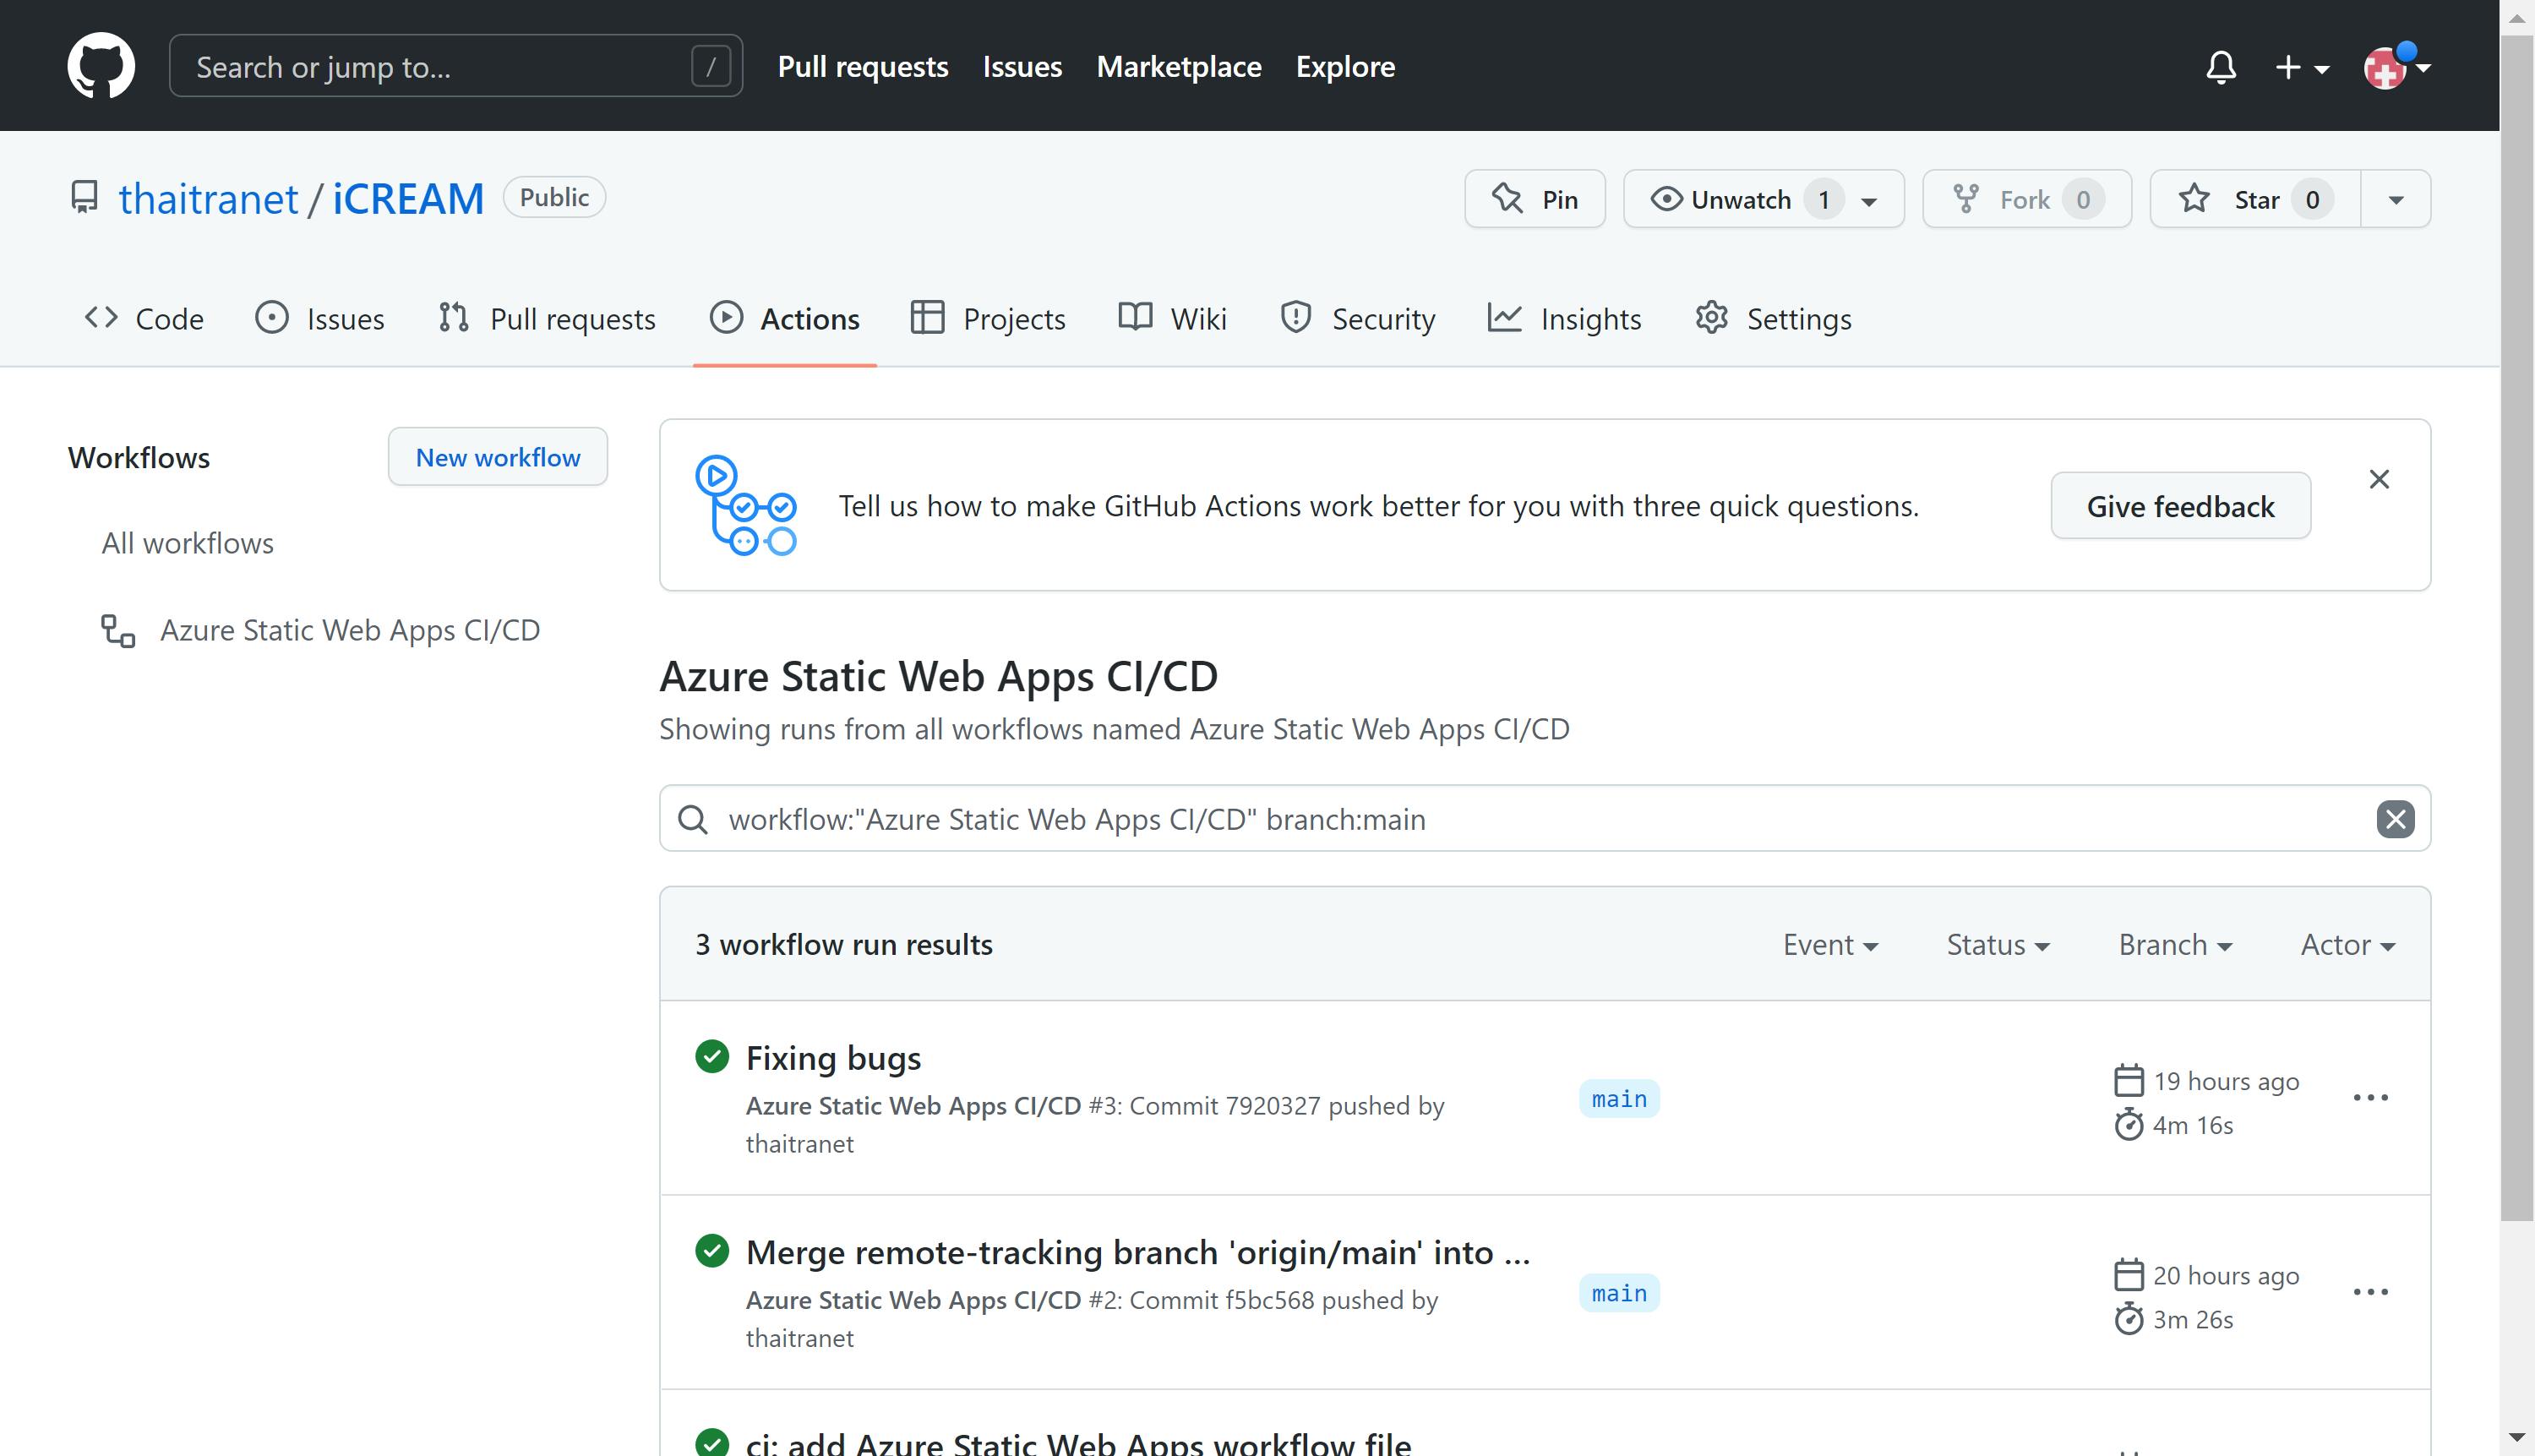
Also, go to the Github Actions your Github repository, you will find that a deployment workflow has been automatically set up for you.
Summary
Congratulations! You've just learnt how to build CMS driven website using Contentful headless CMS and Blazor for .NET 6 and deploy it to Azure Static Web App at no cost. This is the most fun thing to try and I hope you enjoy it. Thanks for reading 🙌.